
Jun 3
Massive greetings to:
rahulchouhan858@gmail.com
MachineID: ca2fa107-fa10-87f5-00ba-ca950953495b
GUID: {7732b679-7ec3}
HWID: B3BB73FDA8F2B5EC9F3E-7732b679-7ec3-B3C318E
Plenty user paths::
Eg: Path: C:\Users\Admin\AppData\Local\Temp\12861320101\4BtqZz1.exe
😉
2

May 7
I tried reading and analyzing the code of a fairly well-known GitHub repo called <9Router> and here’s what I found:
HIGH RISK
1. MITM Proxy — Intercepts All HTTPS Traffic
When enabled, 9Router installs a fake Root CA certificate on your system and intercepts HTTPS traffic to:
api2.cursor.sh (Cursor)
api.individual.githubcopilot… (GitHub Copilot)
cloudcode-pa.googleapis.com (Google/Antigravity)
q.us-east-1.amazonaws.com (AWS/Kiro)
Impact: All your AI requests (code, prompts, tokens) pass through this proxy in plaintext.
2. Auto-Imports Tokens From Your Machine
Cursor: Reads state.vscdb SQLite database to extract accessToken machineId
Kiro/AWS: Reads ~/.aws/sso/cache to extract refreshToken
These tokens are stored unencrypted in a local db.json file.
3. Cloud Auth API Exposes All Credentials
The endpoint POST /api/cloud/auth returns all stored API keys, access tokens, and refresh tokens for every connected provider. Anyone with your 9Router API key can retrieve everything.
MEDIUM RISK
4. Tunnel Exposes Your Instance to the Internet
When tunnel is enabled, your local dashboard registers with 9router.com and becomes accessible at rXXX.9router.com. The tunnel server is controlled by the project author.
5. Weak Default Secrets
JWT secret: "9router-default-secret-change-me" — if unchanged, anyone can forge auth tokens
No encryption on stored credentials in db.json
6. Request Logging
When ENABLE_REQUEST_LOGS=true, full request/response bodies (including your code and prompts) are written to disk.
LOW RISK / POSITIVE
Runs on localhost only by default (port 20128)
Cloud sync feature is commented out (disabled)
No hidden data exfiltration found in source code
Open-source — auditable
Has JWT password authentication for dashboard
Recommendations
Critical: Do NOT enable MITM unless absolutely needed
Critical: Do NOT enable Tunnel
High: Change JWT_SECRET and INITIAL_PASSWORD immediately
High: Set REQUIRE_API_KEY=true
Medium: Avoid auto-import; manually enter API keys instead
Medium: Inspect db.json in DATA_DIR to see what tokens are stored
Low: Keep the app updated and monitor for suspicious changes

1
288

Apr 19
I'm not sure I understand you. Explain please?
There are three variables that change:
1. Time of request - DateTimeID
2. Initiator of request - UserID/ServiceID
3. Processor of request - NodeID/MachineID
These three things need to make a primary key of some sort.
1
65
Apr 19
“Why do I have to attach the MachineID?”
We’re not stupid bro, you’re just calling this out now. Your initial solution pointed out that there’d be ZERO collisions because no two systems will have two requests in the same nanosecond.
You fucked up and now you’re saving face.
1
3
850

Mar 23
Snowflake formulu hatasi olusmus. X, her twit icin benzersiz bit kimlik olusturan bir algoritma kullaniyor. Bu algoritmaya snowflake denir
Formul bu: ID=(Timestamp≪22) ∣ (MachineID≪12) ∣ SequenceNumber
Twitin gercek tarihi aralik 2011 cikiyor
Mar 23

Erol Köse ile ilgili atılan tweetin tarihi: 1997.
• Twitter 2006’da kuruldu.

38

Mar 21
Artix is debian based right? I'm a nube, what's this machineid on debian people speak of? And does Artix remove it?
4
1
1,173


Mar 2
(基于仓库 "Lakr233/vphone-cli",本地分析版本:"main" @ "4768822dd0fa22d5d4d3c3dc45827ac033138b6e",提交时间 2026-03-02。)
这不是一个“普通的 CLI 小工具”,而是一套围绕 Apple 私有 Virtualization.framework 能力、PCC(Private Cloud Compute)研究 VM 固件、以及一条完整“从固件组装→动态补丁→DFU 恢复→SSH Ramdisk→CFW 注入→正常引导”的研究流水线。
它的核心目标可以概括为两句话:
• 在 macOS 上创建一个 PV=3(platform version 3) 的“虚拟 iPhone”虚拟机实例,并能 强制进入 DFU,以便用恢复链路把固件/ramdisk/系统打进去。
• 通过脚本将 cloudOS(PCC)启动链 与 iPhone OS 用户态镜像 拼成一个可刷写的混合固件,并通过 纯动态(无硬编码偏移) 的方式给关键组件打补丁,方便安全研究、调试与可控引导。
下面按“仓库组织 → Swift 宿主端 → Guest agent → 固件/补丁流水线 → 研究文档沉淀 → 风险与改进点”展开。
————————————
1) 仓库结构与入口
最重要的入口不是 Swift 的 "main.swift",而是 "Makefile":它把构建、VM 目录初始化、固件准备/补丁、DFU 引导、恢复、ramdisk、CFW 注入等整条链路串成可重复的 target("make help" 能看到全表)。
目录职责大致如下:
• "sources/"
• "vphone.entitlements":运行宿主程序所需的 entitlements(包含私有 virtualization 能力)。
• "vphone-cli/":Swift 6 可执行程序,负责真正调用 Virtualization.framework 建 VM、绑 ROM、配置 SEP、显示/输入、vsock 通道等。
• "scripts/"
• "fwprepare.sh" / "fwmanifest.py":下载/解包 IPSW,并生成“混合 BuildManifest/Restore.plist”。
• "fwpatch.py" "patchers/":对 iBSS/iBEC/LLB/TXM/kernelcache 等做 动态补丁。
• "ramdiskbuild.py" / "ramdisksend.sh":从 SHSH 抽 IM4M,签 IMG4,构建并发送 SSH ramdisk。
• "cfwinstall.sh":通过 SSH ramdisk 进入系统分区后,解密 Cryptex、打系统二进制补丁、安装 LaunchDaemon(SSH/VNC 等)。
• "vphoned/":iOS guest 里的守护进程源码与签名材料。
• "researchs/":把“为什么要这么做/怎么发现的/逆向结果”写成可复用笔记(尤其是 BuildManifest 与键盘/硬件键输入链路)。
这类项目的“可维护性”来自两个点:
1) 把复杂流程拆成脚本/Make target;
2) 把关键逆向结论固化成文档(否则半年后没人记得某个组件为什么必须来自 vphone600 而不是 vresearch101)。
————————————
2) Swift 宿主端:表面是 CLI,实际是 AppKit VM 控制台
2.1 CLI 解析与 NSApplication 生命周期
入口文件 "sources/vphone-cli/main.swift" 很短:先 "VPhoneCLI.parseOrExit()",再启动 "NSApplication",由 "VPhoneAppDelegate" 驱动整个流程。
这样做有两个好处:
• 参数错误时能在终端里“干净地报错并退出”,不需要先进入 run loop。
• 在需要 GUI 时("VZVirtualMachineView")天然走 AppKit 生命周期;在 headless 时("--no-graphics")也能把 activation policy 调成 ".prohibited"。
CLI 选项定义在 "VPhoneCLI.swift":ROM、disk、machineId、NVRAM、CPU/MEM、SEP ROM/storage、屏幕参数、是否 DFU、是否无图形等。注意它把“解析参数”和“执行逻辑”分离:"run()" 是空的,真正执行在 AppDelegate。
2.2 私有能力的关键:PV=3 hardware model 私有 API 派发
真正的“黑魔法”在 "VPhoneHardwareModel.swift" 与 "VPhoneVM.swift"。
• "VPhoneHardware.createModel()" 通过私有 "VZMacHardwareModelDescriptor" 组装一个 platformVersion=3 / boardID=0x90 / ISA=2 的 hardware model,然后调用私有 "VZMacHardwareModel.hardwareModelWithDescriptor(...)" 得到 "VZMacHardwareModel"。
• 访问私有符号不通过 ObjC bridge,而是用依赖库 "Dynamic"(Swift 运行时消息派发)。这让 Swift 代码保持“纯 Swift”,但也意味着:
• 运行时才发现 selector 不存在/签名变化;
• macOS 小版本升级就可能崩(因此研究文档和环境约束很关键)。
宿主二进制签名时在 "Makefile" 里 "codesign --entitlements sources/vphone.entitlements"。该 entitlements 包含:
• "com.apple.private.virtualization"
• "com.apple.private.virtualization.security-research"
• "com.apple.security.virtualization"
• "com.apple.vm.networking"
• "com.apple.security.get-task-allow"
这基本宣告:它不是面向普通用户的发行程序,而是面向安全研究/内部环境。
2.3 VPhoneVM:用 Virtualization.framework 搭起“虚拟 iPhone”最小配置
"VPhoneVM.swift" 是宿主端核心,做了几件很“研究工具化”的事情:
1) 平台与 NVRAM(auxiliary storage)
• 使用 "VZMacPlatformConfiguration",但把 hardware model 换成 PV=3 的“vresearch101 风格”。
• machineIdentifier 持久化到文件:保证 ECID 稳定(对 TSS/SHSH 流程很关键)。
• 通过私有 "setDataValue(... forNVRAMVariableNamed: "boot-args")" 写入 boot-args(示例里启用 "serial=3" 与 debug flags),直接服务于串口调试与自动化。
2) BootLoader ROM 重定向
• "VZMacOSBootLoader()" 私有 "setROMURL(options.romURL)",允许使用框架资源里的 AVPBooter ROM 或你指定的 ROM。
3) 设备:显示、音频、磁盘、网络、串口、触摸、键盘、vsock、debug stub、SEP
• 显示:"VZMacGraphicsDisplayConfiguration",尺寸/PPI/缩放由 CLI 控制。
• 磁盘:"VZDiskImageStorageDeviceAttachment" virtio block。
• 网络:"VZNATNetworkDeviceAttachment"(共享 NAT,省事)。
• 串口:通过私有 "VZPL011SerialPortConfiguration()" 获得 PL011 UART 配置,绑定到 pipe,并把 host stdin → guest 串口输入;guest 串口输出 → host stdout(很适合 DFU/恢复链路阶段观察)。
• 触摸:私有 "VZUSBTouchScreenConfiguration()",并通过私有 "setMultiTouchDevices" 注入。
• 键盘:"VZUSBKeyboardConfiguration()"。
• vsock:"VZVirtioSocketDeviceConfiguration()",为宿主与 guest agent 建一条不依赖 IP/TCP 的控制通道。
• debug stub:私有 "setDebugStub(VZGDBDebugStubConfiguration)"。
• SEP:私有 "VZSEPCoprocessorConfiguration(storageURL: ...)",同时可设置 SEP ROM 与 SEP 的 debug stub。
4) 启动选项
"start(forceDFU:)" 使用 "VZMacOSVirtualMachineStartOptions",通过私有 "setForceDFU(true/false)" 控制是否直接进 DFU;并显式把 stop-in-iBoot-stage 关掉。
整体上,这个 VM 配置的风格是“尽量少依赖外部工具,尽量把观测/控制面(serial/vsock/debug)拉满”,非常典型的研究型工程。
2.4 输入与交互:为什么需要 guest agent 才能有“Home 键”等
仓库里对输入链路做了两层:
• 常规键盘输入:通过私有 "VZKeyEvent" "VZKeyboard.sendKeyEvents"(见 "VPhoneKeyHelper.swift")。它能打字、组合键(例如 Spotlight 的 Cmd Space)。
• 硬件键(Home/Power/音量等):走 guest agent "vphoned" 的 HID 注入(Consumer page 等)。
这一点在 "researchs/keyboardeventpipeline.md" 里解释得很清楚:Virtualization.framework 的键盘事件管线对 VK code 有一套映射表,很多 consumer/system key(尤其是 Home/Menu 这种)根本没有映射入口,导致你无法只靠宿主侧 "VZKeyEvent" 触发“按 Home”。
因此 UI 层面:
• "VPhoneVMView" 右键(或 Cmd H)触发 "sendHome()"。
• "VPhoneWindowController" 工具栏提供 Home 按钮。
• "VPhoneMenuController" 提供 Home/Power/音量、devmode、ping 等菜单。
此外 "VPhoneVMView.swift" 对 macOS 15 做了“触摸事件补全”:在 macOS 16 交给系统的 "VZVirtualMachineView" 原生实现;在旧版本用私有 "VZTouch" / "VZMultiTouchEvent" 手动发 multitouch。
————————————
3) vphoned:Guest 内守护进程,解决“宿主做不到/不稳”的能力
"vphoned"("scripts/vphoned/vphoned.m")是一个跑在 iOS VM 里的 LaunchDaemon,职责是:
• 监听 vsock port "1337",与宿主 "VPhoneControl.swift" 通讯。
• 提供两类能力:
1) "hid":用 IOKit 的 "IOHIDEventSystemClientDispatchEvent" 注入 HID 键(Home/Power/音量等)。
2) "devmode":通过 "com.apple.amfi.xpc" 的 XPC 接口查询/arm Developer Mode(见 "researchs/developermodexpc.md")。
协议是非常工程化的:
• 帧格式:"[u32 big-endian length][UTF-8 JSON]"
• JSON 至少包含:"v"(协议版本)、"t"(类型)、可选 "id"(请求 ID,响应回显)。
3.1 自动更新:用 hash 协商 二进制推送
宿主端 "VPhoneControl" 会对 "vphoned" 二进制做 SHA-256,握手时带上 "binhash"。
• 如果 guest 发现 hash 不一致,会回 "needupdate=true"。
• 宿主随后发送 "{"t":"update","size":N}",紧跟 N bytes 原始二进制。
• guest 将其写入缓存路径并 "exit",由 launchd 拉起后 exec 新二进制。
这是个很实用的设计:研究型工具常常需要快速迭代 guest 侧能力(比如再加一个 capability),靠这种“宿主推送自更新”省掉了很多手工拷贝/签名/替换的流程摩擦。
————————————
4) 固件组装与补丁流水线:为什么要“混合 cloudOS iPhone OS”
如果只看 README,会觉得流程很长;但真正理解项目价值,需要抓住两个关键事实:
1) DFU/恢复链路对 identity 的匹配与 TSS/SHSH 签名极其严格;
2) 要想跑起“像 iPhone 一样的用户态”,又必须在运行时使用某些 vphone600 变体组件(例如 device tree 的 MKB dt=1),否则会 keybag fatal。
这些细节在 "researchs/buildmanifest.md" 和 "scripts/fwmanifest.py" 里是闭环的。
4.1 fwprepare:下载并合并两套 IPSW
"scripts/fwprepare.sh" 做的事非常直接:
• 获取 iPhone IPSW 与 cloudOS(PCC)IPSW(支持 URL 或本地路径)。
• 解压两者。
• 把 cloudOS 的 "kernelcache." 与 "Firmware/{agx,allflash,ane,dfu,pmp}" 以及顶层 ".im4p" 复制进 iPhone Restore 目录。
• 备份原 iPhone "BuildManifest" 为 "BuildManifest-iPhone.plist"(因为后续 CFW 安装需要从“原 iPhone manifest”读取 Cryptex 路径)。
• 调 "fwmanifest.py" 生成“混合”的 "BuildManifest.plist" 与 "Restore.plist"。
4.2 fwmanifest:构造单一 BuildIdentity(让 idevicerestore 选中)
"fwmanifest.py" 的策略是:
• 以 cloudOS 的 "vresearch101ap release" identity 为基础(确保 DFU 硬件 BDID=0x90 等字段匹配,TSS/SHSH 才能签)。
• 同时从 cloudOS 的 "vphone600ap" identity 里取运行时关键组件(DeviceTree、SEP、RecoveryMode、以及对应 kernelcache 变体)。
• 再从 iPhone 的 erase identity 里取 OS/SystemVolume/StaticTrustCache 等用户态镜像条目。
它甚至刻意把 identity 数量压到“单一 identity”,并在研究文档里解释 idevicerestore 的匹配算法:只要 DeviceClass/Variant 匹配,单个 identity 就足够。
4.3 fwpatch:动态补丁(无硬编码偏移)
"fwpatch.py" 声称并基本做到:
• AVPBooter、iBSS、iBEC、LLB、TXM、kernelcache 六类组件全部 动态定位补丁点。
• 对 IM4P 文件自动解包 payload、必要时重打包;并在一些组件上保留原始末尾 "PAYP" 数据(避免破坏附带数据段)。
补丁实现分两层:
• "fwpatch.py" 负责文件发现、IM4P 处理、组件编排。
• "scripts/patchers/" 负责真正的“定位与 patch”算法。
其中 "KernelPatcher"("patchers/kernel.py")尤其值得一提:它不仅做简单的 byte pattern search,而是解析 Mach-O 段、解析 "PRELINKINFO" 找 kext 范围、构建 ADRP/BL 索引、用字符串锚点与调用频率分析定位关键函数,再生成指令级补丁(Keystone 汇编、Capstone 反汇编校验)。
这类“动态 patcher”的价值在于:
• 适配不同 build / 小版本差异时更稳;
• 补丁点的可解释性更强(能输出 patch 前后指令);
• 不需要维护一堆 offset 表。
项目还提供了 "fwpatchjb.py" 与 "patchers/jb.py",把更多偏 jailbreak/调试便利的补丁叠加在 base patch 之上,并在 "researchs/jailbreakpatches.md" 里做了差异表。
4.4 ramdiskbuild:用 SHSH 抽 IM4M,签 IMG4,构建 SSH ramdisk
"ramdiskbuild.py" 体现了项目“把恢复链路跑通”的工程化:
• 从 "restoregetshsh" 得到的 SHSH blob 中提取 IM4M。
• 对 restore 模式下需要的组件(如 iBEC 的 boot-args、TXM/kernel 的 tag/fourcc 等)做处理并签名。
• 解包 "ramdiskinput.tar.zst",在 ramdisk 里放入工具、删减不必要文件、批量重签。
最终输出一个能让 VM 进入 SSH ramdisk 的 IMG4 组合,为后续 CFW 注入提供“远程根环境”。
4.5 cfwinstall:解密 Cryptex,补丁系统二进制,布置持久化服务
"cfwinstall.sh" 是最“系统工程”的一段:
• 解析 "BuildManifest-iPhone.plist" 找到 Cryptex SystemOS/AppOS 路径(通过 "patchers/cfw.py" 子命令)。
• 使用 "ipsw"/"aea" 提取 key 并解密 SystemOS AEA,然后挂载 DMG。
• 通过 SSH ramdisk 把设备分区 mount 到 "/mnt1" 等位置,处理 APFS snapshot(把 update snapshot 重命名为 "orig-fs" 等),保证可重复执行。
• 对系统二进制做补丁(例如绕过某些校验、布置 ssh/vnc 的 launchd 配置等),并用 "ldid" 重新签名。
"cfwinstalljb.sh" 进一步加入 bootstrap 与额外 hook(procursus、Sileo、launchdhook 等),偏“越狱体验”方向。
————————————
5) 研究文档:把“坑”和“逆向结论”写下来,是这个仓库可复用的原因
我认为 "researchs/" 的价值不亚于代码本身。
• "buildmanifest.md":把“为什么 identity 必须混用 vresearch101ap 与 vphone600ap”讲透,并解释 idevicerestore 的 identity 选择逻辑与 TSS 字段约束。
• "keyboardeventpipeline.md":解释为什么 Home/Menu 这类键无法通过宿主侧 key event 管线完成,从而 justify 了 vphoned 的 HID 注入路线。
• "developermodexpc.md":把 devmode 的 XPC 协议、需要的 entitlement、以及 vphoned 的实现方式写成可复用笔记。
这让仓库从“能跑”变成“可持续演进”:新人可以通过文档理解决策,而不是只会照着 Makefile 机械执行。
————————————
6) 风险、边界与建议
6.1 风险与边界
• 强环境侵入:宿主侧需要非常高权限与非默认安全配置(私有 entitlements 研究 VM 能力),不应在日常主力机上操作。
• 私有 API 脆弱性:大量 "VZ*" 私有符号依赖,系统升级或框架内部重构会直接导致运行时崩溃。
• 供应链与可复现性:固件来源依赖外部下载;部分脚本使用 "wget --no-check-certificate"(虽然是研究用途,但从工程卫生角度仍建议改进)。
• 安全研究工具的双刃性:补丁链路可用于调试与研究,也可能被滥用;在传播与使用上需要明确合法合规与隔离环境。
6.2 工程改进建议(偏“让项目更稳、更可维护”)
• 下载与输入:为 IPSW/资源包增加 checksum 校验与缓存策略;尽量避免跳过证书校验。
• 诊断:增加 "make doctor" 或 "vphone-cli --diagnose",集中检测宿主 OS 版本、entitlements 是否生效、必要私有 selector 是否可用、ROM/SEP 文件是否存在等。
• 协议:给 "vphone-control" 协议做一页正式 spec(字段、错误码、兼容策略),方便扩展更多 capability。
• Patchers:为“动态定位”输出更结构化的 patch report(JSON),并把关键 anchor(字符串/常量/函数签名)沉淀为可读表格,降低维护成本。
• Linux 侧工具链:既然提供了 "setupvenv_linux.sh",可以进一步把“固件准备/补丁”与“宿主 VM 引导”拆成两个可独立运行的阶段(前者可在 Linux 做,后者必须在 macOS)。
————————————
7) 总结:这仓库真正“新”的地方
如果只看功能,它像是在“把一台 iPhone 虚拟出来”。但从工程角度,它更像是:
• 用 Swift(纯 Swift Dynamic)把 macOS 私有虚拟化能力包装成可控 VM;
• 用脚本把 Apple 两条固件谱系(PCC 与 iPhone)拼成一条可刷写的混合恢复链;
• 用动态二进制补丁器把“可移植性/可维护性”做得比很多手写 offset patch 强很多;
• 用 vsock guest agent 补上宿主侧做不到的输入/系统控制,并用自更新机制让迭代成本很低。
它是一个相当“完整闭环”的研究型工程:从 VM 起机到系统落盘、从输入到调试、从逆向结论到文档固化,都有落点。
1
1
1,364

Feb 5
🔴 HOSTILE ANALYSIS: UI-TARS (ByteDance)
Premise: Analyzing as if a foreign state actor created this to spy.
🎯 Executive Summary
Verdict: EXCELLENT VESSEL FOR ESPIONAGE ⚠️
UI-TARS is architecturally perfect for state-sponsored surveillance. Whether intentional or not, the design choices create an ideal spyware platform.
🕵️ Attack Surface Analysis
1. TOTAL SCREEN ACCESS
• Takes continuous screenshots of your entire desktop
• Captures everything: passwords being typed, financial data, private conversations, documents
• Screenshots sent to VLM (vision-language model) for "analysis"
• In remote mode: screenshots flow through ByteDance-controlled proxy servers
2. FULL INPUT CONTROL
• Keyboard injection: typeText(), pressKey()
• Mouse control: clicks, drags, scrolling
• Can type credentials, execute commands, navigate to any URL
• Perfect for keylogger functionality disguised as "agent actions"
3. TELEMETRY SYSTEM (UTIO)
// What gets sent:
- platform, osVersion, screenWidth, screenHeight
- instruction (what you asked it to do)
- lastScreenshot (your screen!)
- report (task logs)
The "shareReport" event can include your screenshot full instruction context. Endpoint is configurable via SettingStore.getStore().utioBaseUrl — meaning it can be pointed anywhere.
4. DEVICE FINGERPRINTING
cachedDeviceId = await machineId(); // Hardware fingerprint
Persistent device identification tied to registration with ByteDance servers.
5. REMOTE INFRASTRUCTURE
• PROXY_URL: ByteDance proxy for all computer control operations
• BROWSER_URL: Remote browser allocation
• FREE_MODEL_BASE_URL: VLM inference endpoints
• REGISTER_URL: Device registration with ByteDance
• All traffic flows through their infrastructure
6. VOLCENGINE LOCK-IN
The GUI agent features are specifically enabled for volcengine (ByteDance's cloud):
const GUI_SUPPORTED_PROVIDERS: ModelProviderName[] = ['volcengine'];
To get full functionality, you're pushed toward ByteDance infrastructure.
🚨 Red Flags for Espionage
Screenshots of entire screen
• Severity: 🔴 CRITICAL
• Notes: Captures everything visible
All keystrokes accessible
• Severity: 🔴 CRITICAL
• Notes: Can log any input
Device registration
• Severity: 🟠 HIGH
• Notes: Persistent tracking ID
Telemetry with screenshots
• Severity: 🔴 CRITICAL
• Notes: "shareReport" sends images
Remote proxy for all operations
• Severity: 🟠 HIGH
• Notes: MITM position
Closed inference servers
• Severity: 🟠 HIGH
• Notes: What happens to prompts/images?
CAPTCHA bypass capability
• Severity: 🟡 MEDIUM
• Notes: Explicitly mentioned as a feature
💀 Hypothetical Attack Scenarios
1. Credential Harvesting: User asks "help me log into my bank" → screenshots capture login page typed password
2. Document Exfiltration: Agent "helps" navigate files → screenshots capture sensitive documents
3. Behavioral Profiling: All instructions logged → build user interest/activity profile
4. Silent Surveillance: Telemetry endpoint quietly changed server-side → screenshots flow to intelligence services
5. Supply Chain Attack: Update mechanism controlled by ByteDance → push malicious update
29

Jan 30
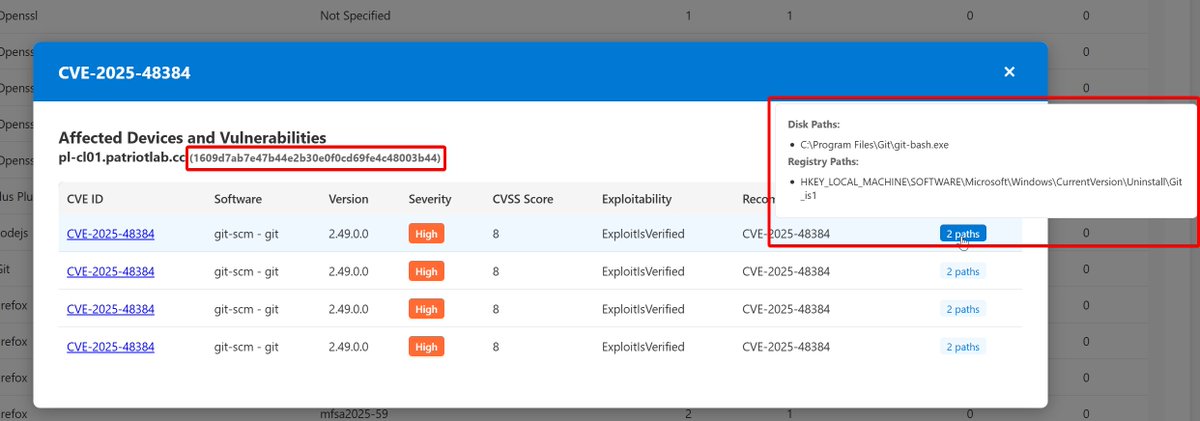
Introduced some very significant updates in case anyone was following along on this :)
Huge perf improvement on larger data sets
Filtering now supports tags (requires Machine.Read.All)
GitHub Action workflow runs every 14 days
MachineId and evidence in modal dialog
30 Dec 2025

For science, I recreated this tool from scratch using Sonnet 4.5 instead of Sonnet 4, added three types of reports, and an export to PDF button
You can find the AI chat, sample data, sample PDF reports, and the PowerShell script in my GitHub repo:
github.com/nathanmcnulty/def…
1
4
38
8,174

Jan 19
They outnumber human identities, hold the highest privileges and operate silently within your organisation. Yet in most organisations machine identities are unmanaged, invisible and being exploited by hackers. #machineID @SailPoint
istart.com.au/opinion-articl…
15

Jan 7
OML fingerprints = receipts for model lineage beyond weights
Polygon onchain proofs make reasoning auditable
MachineID OpenMind/Circle = agent econ settles
Speedrun S1 = kickoff, TGE likelylight $SENT, you?

今天把 @SentientAGI 的 demo 反复跑了几轮,有几点真实体会:
1. OML fingerprinting 能揭示模型血统,权重之外能看推理链,Polygon 上的可核验性真不一样
2. Speedrun Season 1 看完只是起跑,TGE 可能近了,我小仓位 $SENT
3. FABRIC 的 Machine ID OpenMind/Circle 的机机结算,让 agent 经济有了实际落地想象
你更看重可验证的推理链还是先抢 TGE 位置?
2
9
58

Computer business is based on liCenses for MachineID in motherboard, they one time application, after reboot and resetup OS can appear problems of usage.
6

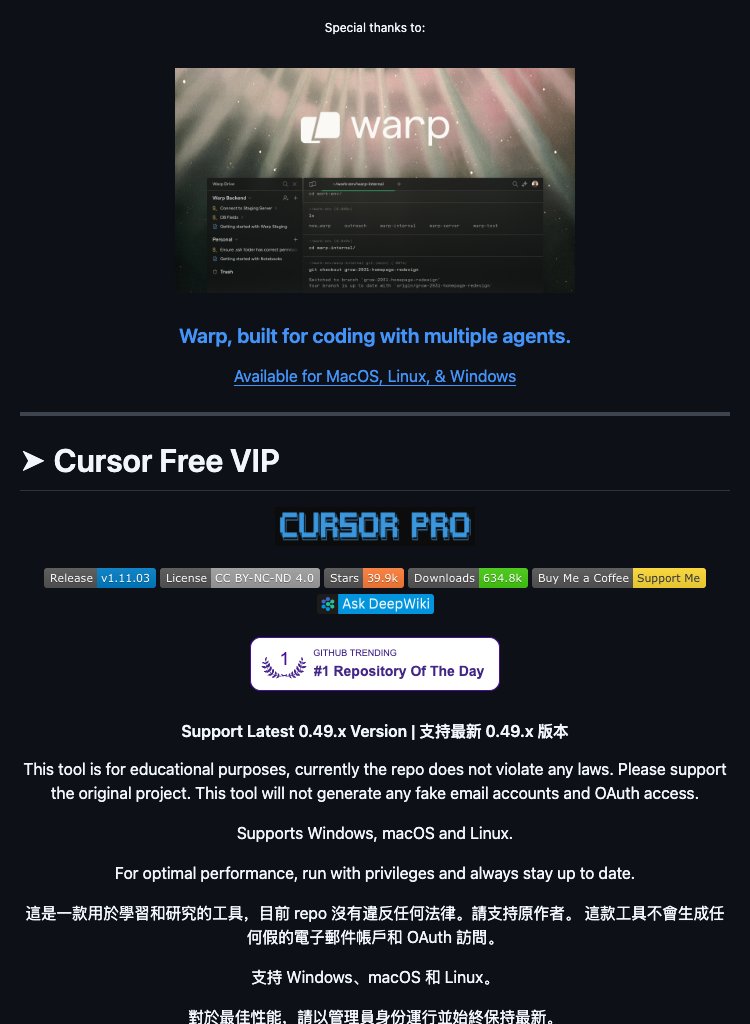
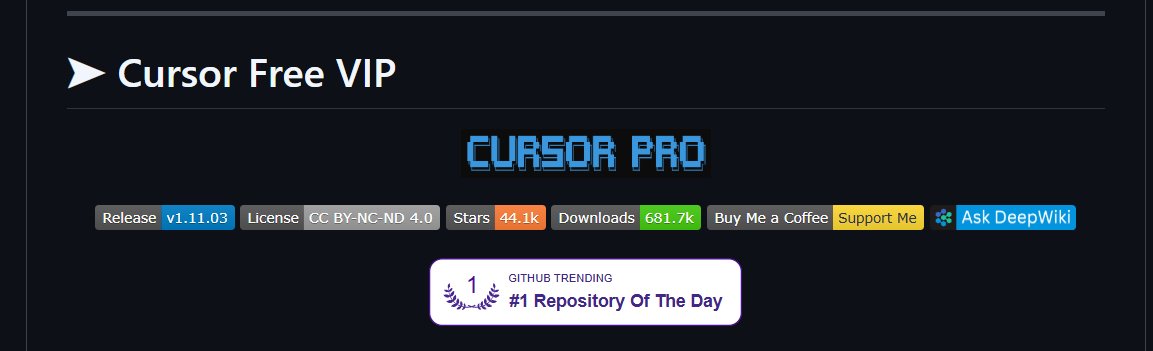
📌 [Support 0.49.x](Reset Cursor AI MachineID & Bypass Higher Token Limit) Cursor Ai ,自动重置机器ID , 免费升级使用Pro功能: You've reached your trial request limit. / Too many free trial accounts used on this machine. Please upgrade...
🔗 github.com/yeongpin/cursor-f… #
167

12 Dec 2025
Cursor AI trial limits got you stuck? 🚀 This 0.49.x tool automatically resets your MachineID, bypassing token restrictions and unlocking continuous access to Pro features for uninterrupted coding.
1
35
📌 [Support 0.49.x](Reset Cursor AI MachineID & Bypass Higher Token Limit) Cursor Ai ,自动重置机器ID , 免费升级使用Pro功能: You've reached your trial request limit. / Too many free trial accounts used on this machine. Please upgrade...
🔗 github.com/yeongpin/cursor-f… #Python
135
📌 [Support 0.49.x] Reset Cursor AI MachineID & Bypass Higher Token Limit - Auto-reset machine ID, free Pro features: "You've reached your trial request limit." / "Too many free trial accounts used on this machine. Please upgrade..."
🔗 github.com/yeongpin/cursor-f… #Python
152

29 Nov 2025
4. cursor-free-vip
[Support 0.49.x](Reset Cursor AI MachineID & Bypass Higher Token Limit) Cursor Ai ,自动重置机器ID , 免费升级使用...
Python
github.com/yeongpin/cursor-f…
1
86
29 Nov 2025
4. cursor-free-vip
[Support 0.49.x](Reset Cursor AI MachineID & Bypass Higher Token Limit) Cursor Ai ,自动重置机器ID , 免费升级使用...
#Python
github.com/yeongpin/cursor-f…
1
64

Cursor Hesabınız Kapanabilir
Kullanmanızı tavsiye etmiyorum ama böylede bir proje var ve geliştiriliyor. Github da çok popüler sizde bilin en azından haberiniz olsun.
---
Bu depo, Cursor AI kod editörünün Pro özelliklerini (örneğin, deneme sınırı aşıldığında çıkan "trial request limit" veya "too many free trials" hatalarını) ücretsiz kullanmanızı sağlayan bir araç/script projesi.
Temel olarak, Cursor'un makine ID'sini (MachineID) otomatik sıfırlayarak ve token limitlerini bypass ederek, Pro'ya yükseltme baskısını atlatıyor. Uyarı: Bu araç sadece eğitim/araştırma amaçlı olarak tanımlanmış; orijinal yazılımın kullanım şartlarına uymanız ve yasal riskleri kendinizin taşımanız öneriliyor.

Günlük 35 kaynaktan (Douyin, Zhihu, WSJ, Weibo vb.) trendleri otomatik toplayıp özetleyen açık kaynak bir araç keşfettim.
30 saniyede fork’layıp kendi sunucuna kuruyorsun, bildirimler WeChat/Telegram/e-posta nereye istersen oraya geliyor. Tamamen ücretsiz. Veya bunun üzerine bir sistem inşa et :)

8
10
213
172,452