
I edit Vlogs and Talking head videos.
Joined January 2018
- Tweets 146
- Following 38
- Followers 20
- Likes 10,886
39 Photos and videos


May 19
30 days ago, I started the $1K in 30 challenge by @EditorArtem.
Am I at $1K/month?
No.
But I showed up every single editing, creating, learning and building something.
The goal isn't done. I'm just getting started.
1
36
May 19
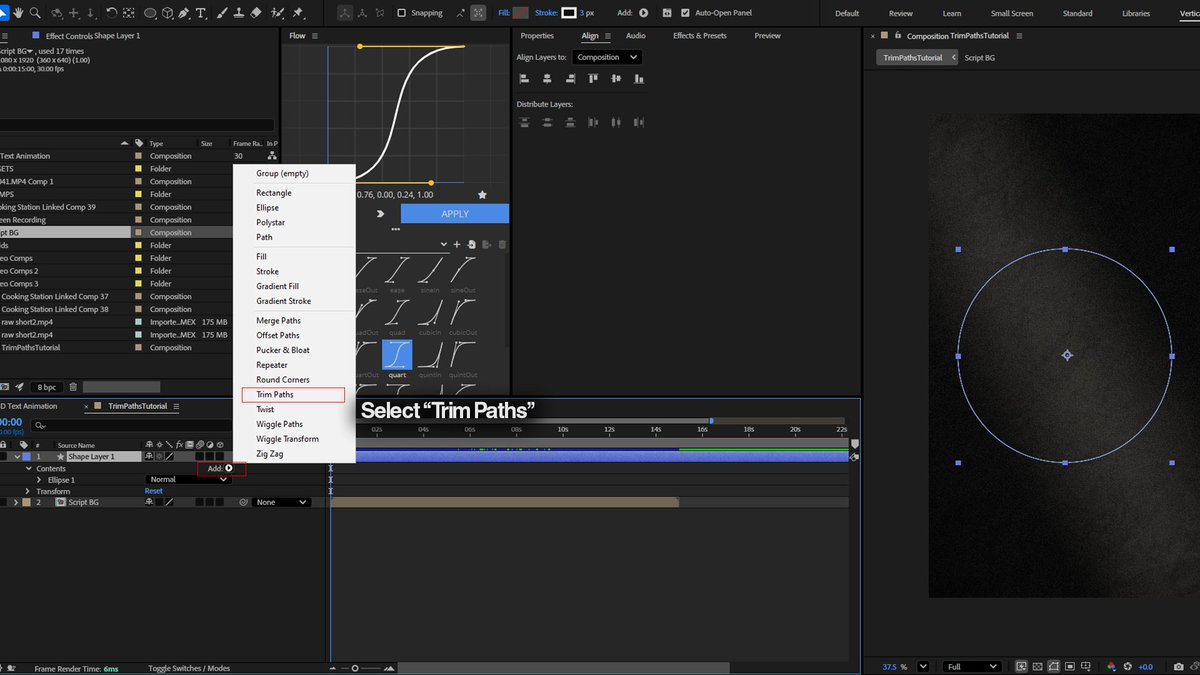
That smooth cursor animation you just saw? Built entirely from scratch in After Effects.
Here's exactly how I did it. 🧵
1
1
83
May 19
3 >> Add the click animation.
Create a Scale keyframe on the cursor layer. On the click frame, scale it down slightly, then back up instantly. This creates a natural click animation.
1
74
May 19
Bonus Tip: Turn on Motion Blur for your cursor layer. This single toggle makes your cursor movement feel cinematic rather than flat and digital.
87
May 17
Intro Edit for @tomnoske_
Edited on Premiere Pro and After Effects ⏳
DMs are open... ⬆️
1
1
144
May 13
That clean animated line you see in almost every motion graphics video?
It takes less than 5 minutes to create in After Effects.
Here's exactly how. 🧵
1
65
May 13
3 >> Keyframe the End value.
Set the End value to 0% at your start point, move forward on the timeline and set it to 100%.
Your outline now animates from start to finish.
1
211
May 13
Ease your keyframes for a smooth natural animation.
That's it. Three simple steps to create a clean animated shape outline in After Effects.
Save this thread and try it on your next project.
46
May 9
How to never let your audio clip again in Premiere Pro: 🧵
If your audio is peaking, it can ruin your perfect video. Here are two quick ways to make sure your audio never crosses a level you don't want it to.
1
31
May 9
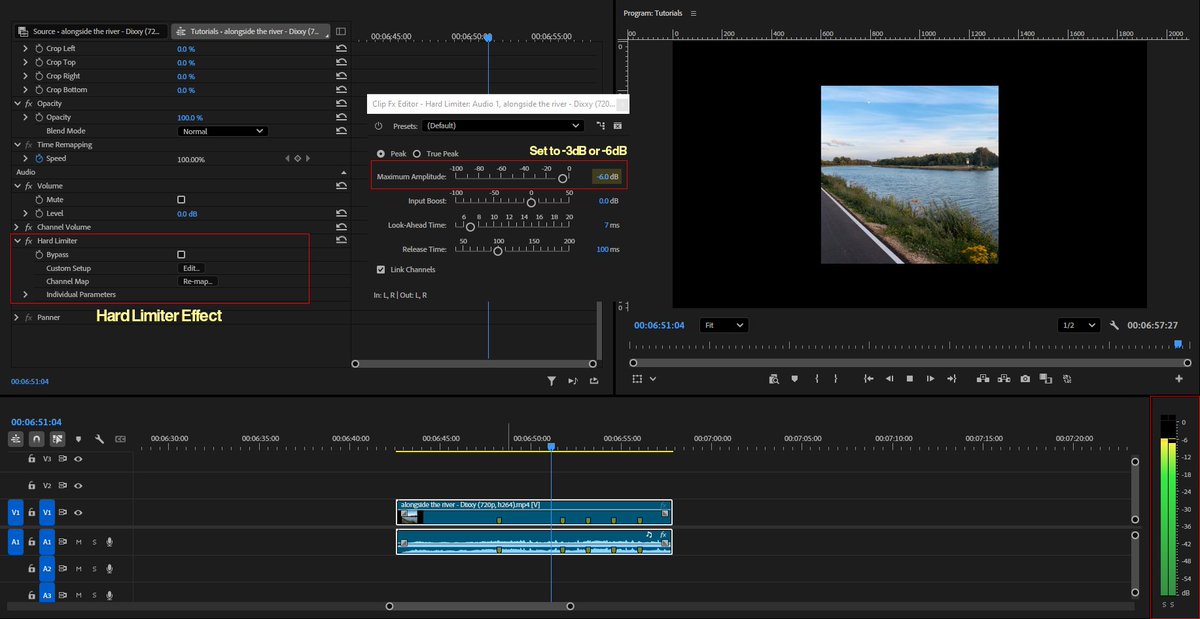
1 >> Hard Limiter
Go to your Audio Effects panel and search for Hard Limiter. Drop it onto your audio clip.
Set the Maximum Amplitude to your desired dB level. Any audio beyond that point gets hard capped and will never cross it no matter how loud the original clip is.
1
416
May 9
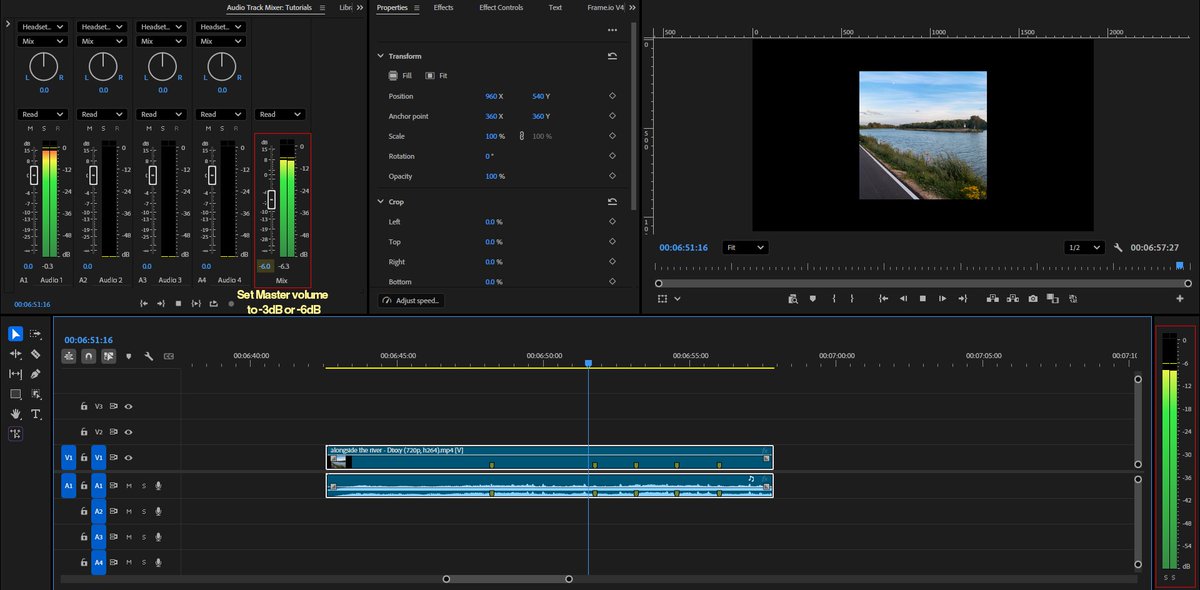
2 >> Master Audio
Go to your Audio Track Mixer and find the Master fader at the far right.
Reducing this down lowers the overall output level of your entire audio sequence in one move. No individual clip adjustments, no track by track changes needed.
97
May 8
3 ways I use Adjustment Layers in Premiere Pro: 🧵
1 >> Color Grading
Drop an Adjustment Layer above your entire sequence, apply your LUT or Lumetri Color grade once and it affects every clip underneath instantly. No more grading clip by clip.
1
40
May 8
2 >> Adding Transitions
Place an Adjustment Layer at every cut and apply your transition effect directly to it. This gives you full control over your transitions without touching your original clips.
1
51
May 8
3 >> Cinematic Overlays
Use an Adjustment Layer to add a vignette, film grain or cinematic letterbox across your entire video in one single step.
43
May 7
3 secret Premiere Pro tricks you probably didn't know about: 🧵
1 >> Auto Reframe
Auto Reframe uses AI to automatically convert your 16:9 footage into 9:16 format without a single manual keyframe.
Click on Sequence, select Auto Reframe and let Premiere do the work.
1
47
May 7
2 >> Track Matte Key
Cinematic text effect using the Track Matte Key.
Place your text layer above your footage, add a Track Matte Key to the footage layer and set it to your text layer as the matte. Your footage will now play through the shape of your text.
1
54
May 7
3 >> Workspaces
Setting up dedicated workspaces for Vertical and Horizontal edits is the most underrated productivity hacks.
Arrange your panels exactly how you want them → go to Window → Workspaces → Save as New Workspace → name it and save.
50