28 Dec 2025
かわいくてごめん
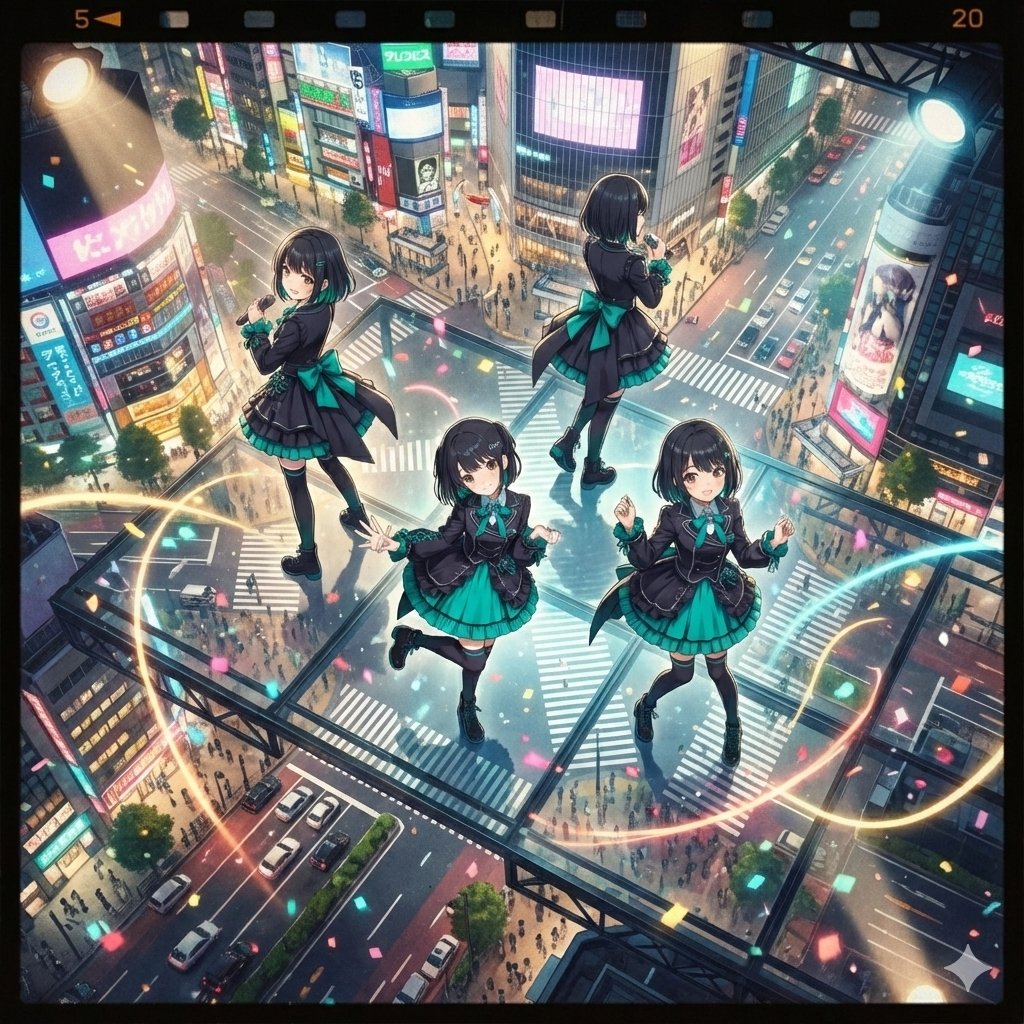
GeminiのNano Banana Proで画像を編集してみた。
実は簡易版なんですけど、Gemini 画像加工指示ツールていうのを作ったので使ってみた画像です。
生成内容は東京の街並みでフィルムのような画面で、MV撮影しているような風景でカメラのアングルだけ変更しています。
Gemini 画像加工指示ツールとは何か?
というとGeminiに画像生成を指示するYAMLを生成するツールです。
YAMLってなんやねんと思う人もいるでしょうけど、簡単に言うと人間とAIとの通訳みたいなもんだと思っていただければと思います。
普通に日本語とかでも指示は出来るんですけど、なかなか理解しない場合があるので、YAMLで指示してあげるとスムーズに理解してくれる場合が多いです。
ワイみたいな本当に素人用のツールなんですけど、使い方は・・・
①この投稿に貼っているソースコードをテキストファイルにコピーして、HTML形式で保存する。※一旦テキストで保存して拡張子をHTMLに変更でも可。
②パソコンで保存したファイルを開く。
③開くとブラウザでツールが開くので、まずは画像したい画像ファイルをツールで読み込む。
④あとは設定項目を指示に従って選択とか入力する。
※入力項目は特に指定はなくてしたいことを入力してください。入力しなくても大丈夫です。
⑤各項目の指定が終わったら「指示書YAMLを生成」のボタンをクリックします。
⑥YAMLが生成されるのでコピーします。
⑦Geminiにアクセスして、編集したい画像ファイルをアップロードして、入力欄で先程コピーしたYAMLのソースをペーストします。
⑧画像生成します。
以上。
以下、ソースコード
<!DOCTYPE html>
<html lang="ja">
<head>
<meta charset="UTF-8">
<meta name="viewport" content="width=device-width, initial-scale=1.0">
<title>Gemini 画像加工指示ツール</title>
<style>
body { font-family: "Helvetica Neue", Arial, sans-serif; background-color: #f0f2f5; color: #333; padding: 20px; }
.container { max-width: 900px; margin: 0 auto; background: #fff; padding: 30px; border-radius: 12px; box-shadow: 0 4px 15px rgba(0,0,0,0.1); }
h1 { text-align: center; color: #ff5722; margin-bottom: 30px; } /* 画像系なので少し暖色に */
h2 { border-bottom: 2px solid #ff5722; padding-bottom: 10px; margin-top: 30px; font-size: 1.2em; }
/* ファイルアップロード */
.file-upload-area { border: 2px dashed #ccc; padding: 20px; text-align: center; border-radius: 8px; margin-bottom: 30px; background: #fafafa; }
#fileNameDisplay { margin-top: 10px; font-weight: bold; color: #ff5722; }
/* 動的フォームエリア */
.control-group { margin-bottom: 20px; padding: 15px; background: #f9f9f9; border-radius: 8px; border-left: 4px solid #ddd; }
.control-label { font-weight: bold; display: block; margin-bottom: 8px; }
select, input[type="text"] { width: 100%; padding: 10px; border: 1px solid #ccc; border-radius: 4px; }
/* ラジオボタン、チェックボックスのスタイル調整 */
.radio-group, .checkbox-group { display: flex; flex-wrap: wrap; gap: 10px; }
.radio-option, .checkbox-option { background: #fff; padding: 8px 12px; border: 1px solid #ddd; border-radius: 20px; cursor: pointer; transition: all 0.2s; }
.radio-option:hover, .checkbox-option:hover { background: #eee; }
input[type="radio"], input[type="checkbox"] { margin-right: 8px; accent-color: #ff5722; }
/* フリーテキスト */
textarea { width: 100%; height: 80px; padding: 10px; border: 1px solid #ccc; border-radius: 4px; resize: vertical; }
.btn-gen { display: block; width: 100%; padding: 15px; background-color: #ff5722; color: white; border: none; border-radius: 4px; font-size: 18px; font-weight: bold; cursor: pointer; margin-top: 30px; transition: background 0.3s; }
.btn-gen:hover { background-color: #e64a19; }
pre { background: #2d2d2d; color: #f8f8f2; padding: 20px; border-radius: 4px; overflow-x: auto; white-space: pre-wrap; position: relative; }
.copy-btn { position: absolute; top: 10px; right: 10px; background: #555; color: white; border: none; padding: 5px 10px; border-radius: 4px; cursor: pointer; font-size: 12px; }
</style>
</head>
<body>
<div class="container">
<h1>Gemini 画像加工指示ツール</h1>
<h2>STEP 1: 画像選択</h2>
<div class="file-upload-area">
<input type="file" id="imageInput" accept="image/png, image/jpeg, image/webp">
<div id="fileNameDisplay">ファイルが選択されていません</div>
</div>
<h2>STEP 2: 加工指示の設定</h2>
<div id="dynamicFormArea"></div>
<div class="control-group" style="border-left-color: #ff5722;">
<label class="control-label">その他の自由記述 (Additional Notes)</label>
<textarea id="freeText" placeholder="上記項目で表現しきれない細かいニュアンスなどを記述"></textarea>
</div>
<button class="btn-gen" onclick="generateImageYaml()">指示書YAMLを生成</button>
<div id="outputArea" style="display:none; margin-top: 30px;">
<h2>生成結果</h2>
<pre id="yamlOutput"><button class="copy-btn" onclick="copyToClipboard()">コピー</button><code id="yamlCode"></code></pre>
</div>
</div>
<script>
// =========================================
// 【設定エリア】将来の拡張はここを編集します
// =========================================
const FORM_CONFIG = [
{
id: "style",
title: "① スタイル・画風 (Style)",
type: "select", // ドロップダウン形式
options: ["指定なし (元のスタイルを維持)", "写真 (Photorealistic)", "アニメ調 (Anime style)", "水彩画風 (Watercolor)", "サイバーパンク (Cyberpunk)", "ピクセルアート (Pixel Art)"]
},
{
id: "composition",
title: "② カメラ構図・アングル (Composition)",
type: "radio", // ラジオボタン形式(単一選択)
options: ["指定なし", "クローズアップ", "バストアップ", "全身が写るように", "広角レンズでダイナミックに", "真上からの視点 (Top-down view)"]
},
{
id: "background",
title: "③ 背景の変更 (Background)",
type: "text", // 自由入力形式
placeholder: "例: 賑やかな東京の街並みに変更、背景を完全に白抜きにする、など"
},
{
id: "lighting",
title: "④ 照明・雰囲気 (Lighting & Mood)",
type: "select",
options: ["指定なし", "自然光 (Natural light)", "劇的なライティング (Dramatic lighting)", "夕暮れ (Golden hour)", "ネオンサインの光 (Neon lights)", "薄暗くシリアスな雰囲気"]
},
{
id: "elements_to_add",
title: "⑤ 追加要素 (Add Elements)",
type: "text",
placeholder: "例: 被写体に赤いマフラーを追加、空に飛行船を追加、など"
}
// ★将来ここに新しい設定ブロックを追加するだけで、画面に自動反映されます★
];
// =========================================
// システムロジック(触らなくてOK)
// =========================================
// 起動時にフォームを動的に生成する
window.onload = function() {
const formArea = document.getElementById('dynamicFormArea');
FORM_CONFIG.forEach(config => {
let html = `<div class="control-group" data-id="${config.id}" data-type="${config.type}">`;
html = `<label class="control-label">${config.title}</label>`;
if (config.type === 'select') {
html = `<select id="${config.id}">`;
config.options.forEach(opt => {
html = `<option value="${opt}">${opt}</option>`;
});
html = `</select>`;
} else if (config.type === 'radio') {
html = `<div class="radio-group">`;
config.options.forEach((opt, index) => {
const radioId = `${config.id}_${index}`;
html = `<label class="radio-option" for="${radioId}">`;
html = `<input type="radio" id="${radioId}" name="${config.id}" value="${opt}" ${index === 0 ? 'checked' : ''}>${opt}`;
html = `</label>`;
});
html = `</div>`;
} else if (config.type === 'text') {
html = `<input type="text" id="${config.id}" placeholder="${config.placeholder}">`;
}
html = `</div>`;
formArea.innerHTML = html;
});
// ファイル選択時の表示更新
document.getElementById('imageInput').addEventListener('change', function(e) {
const fileName = e.target.files[0] ? e.target.files[0].name : "ファイルが選択されていません";
document.getElementById('fileNameDisplay').textContent = "選択中: " fileName;
});
};
function generateImageYaml() {
const fileInput = document.getElementById('imageInput');
const fileName = fileInput.files[0] ? fileInput.files[0].name : "(画像をアップロードしてください)";
const freeText = document.getElementById('freeText').value;
// 動的フォームの値を取得
let instructionsYamlStr = "";
FORM_CONFIG.forEach(config => {
let value = "";
if (config.type === 'select' || config.type === 'text') {
value = document.getElementById(config.id).value;
} else if (config.type === 'radio') {
const checkedRadio = document.querySelector(`input[name="${config.id}"]:checked`);
if (checkedRadio) value = checkedRadio.value;
}
// "指定なし" や空欄以外をYAMLに追加
if (value && !value.startsWith("指定なし")) {
instructionsYamlStr = ` ${config.id}: "${value}"\n`;
}
});
// 自由記述を追加
if (freeText) {
instructionsYamlStr = ` additional_notes: |\n${indentString(freeText, 6)}\n`;
}
// 最終的なYAMLを組み立て(画像編集指示用のプロンプト構造)
const finalYaml = `system_instruction:
role: "熟練した画像編集レタッチャー兼AIアーティスト"
task: "ユーザーが提供する入力画像を、指示に基づいて加工・修正し、新しい画像を生成すること。"
request:
input_image_reference: "${fileName}"
editing_instructions:
${instructionsYamlStr || " (特に指定なし。元画像の良さを活かしてください。)"}
`;
document.getElementById('yamlCode').textContent = finalYaml;
document.getElementById('outputArea').style.display = 'block';
}
function indentString(str, count) {
const indent = ' '.repeat(count);
return str.split('\n').map(line => indent line).join('\n');
}
function copyToClipboard() {
const text = document.getElementById('yamlCode').textContent;
navigator.clipboard.writeText(text).then(() => alert('コピーしました!'));
}
</script>
</body>
</html>
将来的に指定したい項目を足したい人はソース内の
// ★将来ここに新しい設定ブロックを追加するだけで、画面に自動反映されます★
の行に以下のようなソースを足していただければ指定項目は増やせます。
例:天気の項目を増やしたい場合
, { id: "weather", // YAMLのキー名になります title: "⑥ 天候 (Weather)", // 画面の表示名 type: "select", // select(ドロップダウン)か radio(ボタン)か text(自由入力) options: ["指定なし", "快晴", "雨天", "雪", "嵐"] // 選択肢 }
#Gemini #NanoBananaPro #Gemini画像加工指示ツール

1
2
625

18 Jul 2025
📸 Just integrated camera access in my Flutter app!
Created an ImageInput widget that opens the device camera and will soon show a live preview pass image data to the main screen.
Slowly turning concepts into real apps. Let’s go 🚀
#BuildInPublic #FlutterDev #100DaysOfCode
1
6
70

18 Nov 2024
Remove the image decoding boilerplate from your ML APIs. LitServe introduces ImageInput schema 🚀
✅ Automatically decodes base64 encoded image
✅ Based on Pydantic
✅ No boilerplate

1
12
367

4 Oct 2023
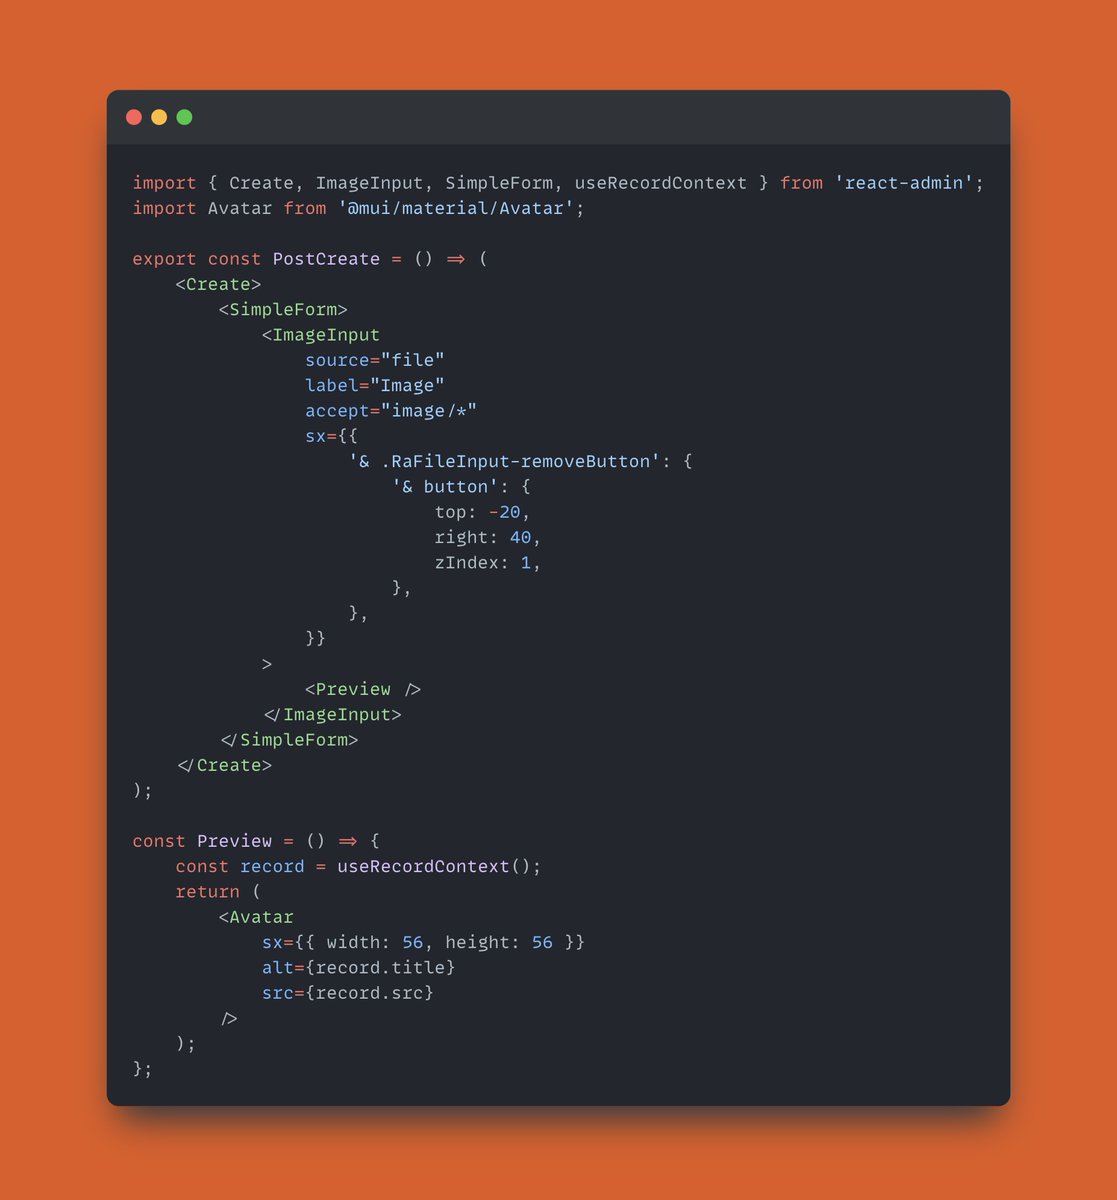
📢#TipOfTheWeek⚛️: You can customize the preview of an image file dropped in an <ImageInput> component: marmelab.com/react-admin/Ima….
🔁Let’s replace the default preview provided by <ImageField>, with the #MUI Avatar component.
#reactadmin #react #webdev #opensource
1
5
330

Now you can search for products and services by simply inputting a picture into Bing Chat. It also helps you optimize your online presence by adding high-quality images of your products
#BingChat #Microsoft #ImageInput
onmsft.com/news/bing-chat…

2
23

4 Jul 2023
2. Embrace visuals.
Graphics diagrams, and charts can greatly enhance reader comprehension and retention. Use them whenever appropriate to enhance the understanding of complex concepts.
#writingtips #ImageInput #graphiccontent
2
44

24 Nov 2021
Playing around with an ImageInput widget for @Panel_org.
#python #datascience #machinelearning #businessintelligence #artificialintelligence
1
2
7