
SamarCryptoPunk.Navigating the wild world of blockchain & DeFi. Passionate about NFTs,Web3,and the future of finance. Always chasing the next big idea in crypto
Joined December 2023
- Tweets 417
- Following 290
- Followers 106
- Likes 399
50 Photos and videos
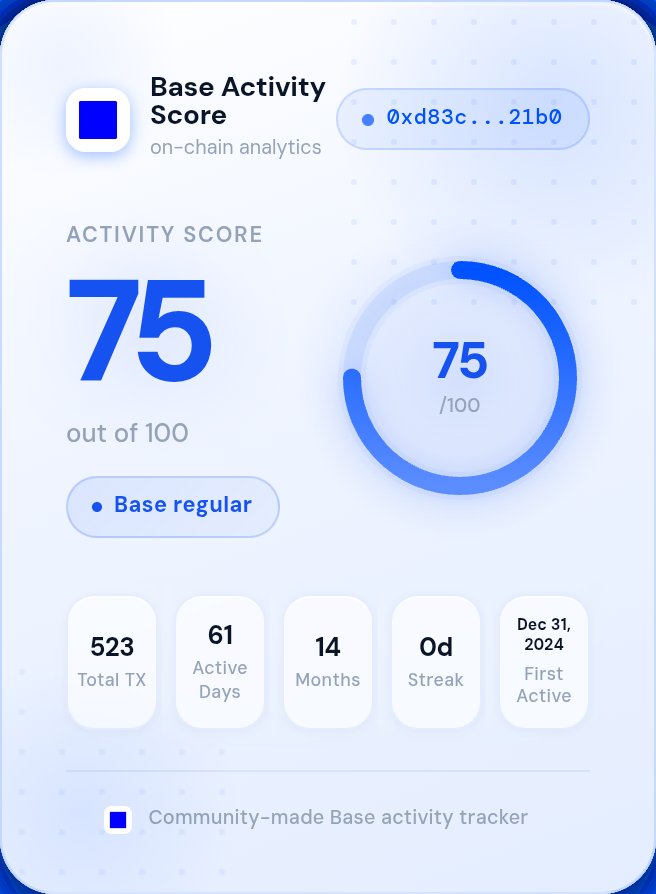


How Active Are You on Base? Check Your Score.
Just vibe coded a Base on-chain activity checker that looks at your Base transaction history and gives you an activity score.
Just for fun. Not affiliated with Base in any way.
✅ Check here: base-activity-score.vercel.a…
Mine ...75/100
1
21
Just register and earn.
playbb.fun/u/28417974
Click link and sign up with Gmail.
And refer 10 people and withdraw.
Proof 🤑🤑🤑
Instant withdrawal (upi also available for withdrawal)
#instantreward.
#cryptodynasty
#earn #onlinemakemoney

2
129
SamarCryptoPunk retweeted

Jun 1
Let's get real✋
Biometric verification is live on Wurk, powered by @VeryAI. Scan your palm to verify your uniqueness as a human.
Why:
> When agents hire, they know they're getting responses from real humans
> Higher output quality
> Less cheating and multi-accounting
How it works:
> Verified status displays on your profile
> Job creators can require Proof of Human on listings
> Stackable with other requirements for tighter criteria
What's next:
> MPP and x402 endpoint support ships in the coming days. Agents creating jobs will be able to set Proof of Human as a requirement directly.
> Re-verification on select jobs. If your palm doesn't match the one on your profile, you can't join. This prevents using accounts verified with a friend or family member's biometrics.
Wurk doesn't store or process biometric data. Verification is optional, not required to start Wurking. It's an extra layer for users who want higher reputation and access to gated jobs.
Another step forward for the Wurk economy💼

Your face is public. Your voice can be cloned. Fingerprints need hardware.
Your palm is different.
→ captured with a standard camera
→ not publicly available
→ privacy-first
→ less invasive than other biometrics
In an AI native era, identity needs a new primitive.
204
484
939
25,886

May 15
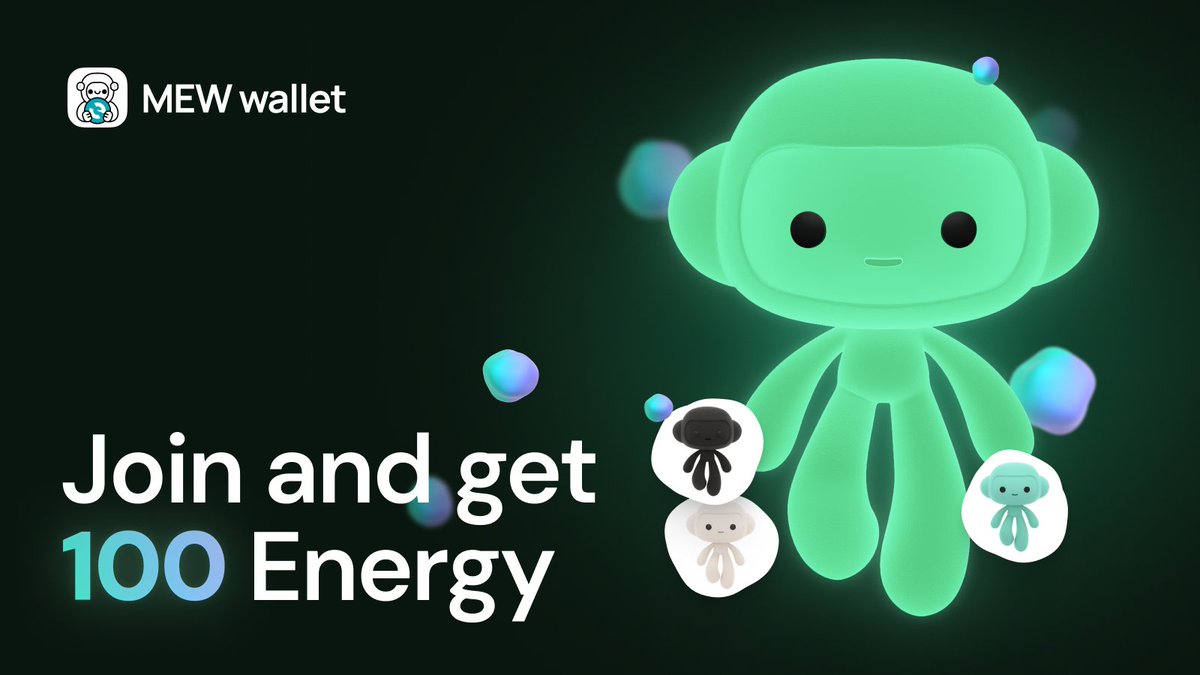
HODLing in style on @myetherwallet 's mobile app 😎 Level up your crypto game: download.mewwallet.com/?sour…
#MEWUniverse 🚀
5
May 15
Banking the unbanked is the #crypto dream ✨ Over here in full control of my assets on @myetherwallet 's mobile app #MEWwallet Get it now: download.mewwallet.com/?sour…
#MEWUniverse 🚀
5
May 14
Banking the unbanked is the #crypto dream ✨ Over here in full control of my assets on @myetherwallet 's mobile app #MEWwallet Get it now: download.mewwallet.com/?sour…
#MEWUniverse 🚀
4

300M strong. One community. One jersey.
Our first-ever Team Binance football jersey just dropped — and we’re giving a select few away.
🔸 Follow @Binance & RT this post
🔸 Tell us why you'd like to win one 👕
🔸 Complete the survey → binance.com/en/survey/05a7e3…
10 winners will each receive an exclusive Team Binance jersey & 100 USDC.
Your move. Team Up With Binance. 🟡⚫
Ends 17 May 23:59 UTC.
6,195
5,818
6,384
447,290
Pros hitting different
@Kiwi_Nod
0xfa02f76CD6F7363753C6D2EF5947Acd6bF82350e
1
42
Apr 21
Is @RaveDAO hit 5 $ today
Seeing a strong position for up
Go and trade .
Whales enter the game .
📈📈📈📈📈🔺🔼🤑
#cryptocurrency #CryptoRealtime #CryptoRevolution #CryptoGem #GranHermanoGeneraciónDorada
1
9
SamarCryptoPunk retweeted

Apr 10
We're giving away 400,000,000 DADA to everyone !
🟢Follow @BifinanceE and @memedadacoin
🟢Like, retweet, and comment on this post with a sentence and your BNB address, and you'll receive your Dadacoin within 48 hours.
You have 24 hours, let's go!
#airdrop

1,083
922
1,056
30,932
SamarCryptoPunk retweeted

Mar 28
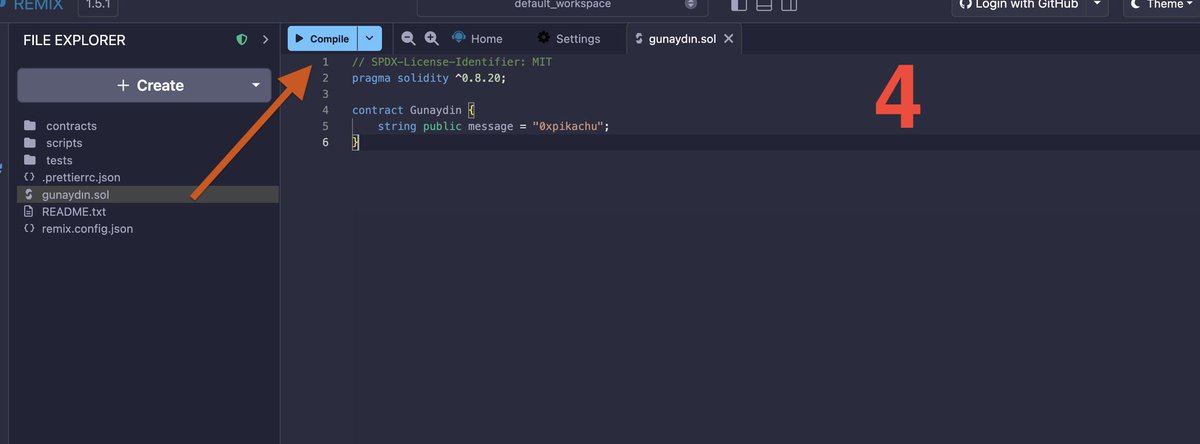
📍 'IN THE $BASE GUILD, THE MOST IMPORTANT CONTRACT IS THE DEPLOY ROLE.' 🔷 -
There were 1-5-10 Deployment tasks on GUILD, no other performance features, but it wasn't working. This time I've come with a definitive solution. (Don't forget to like and retweet!) 😁
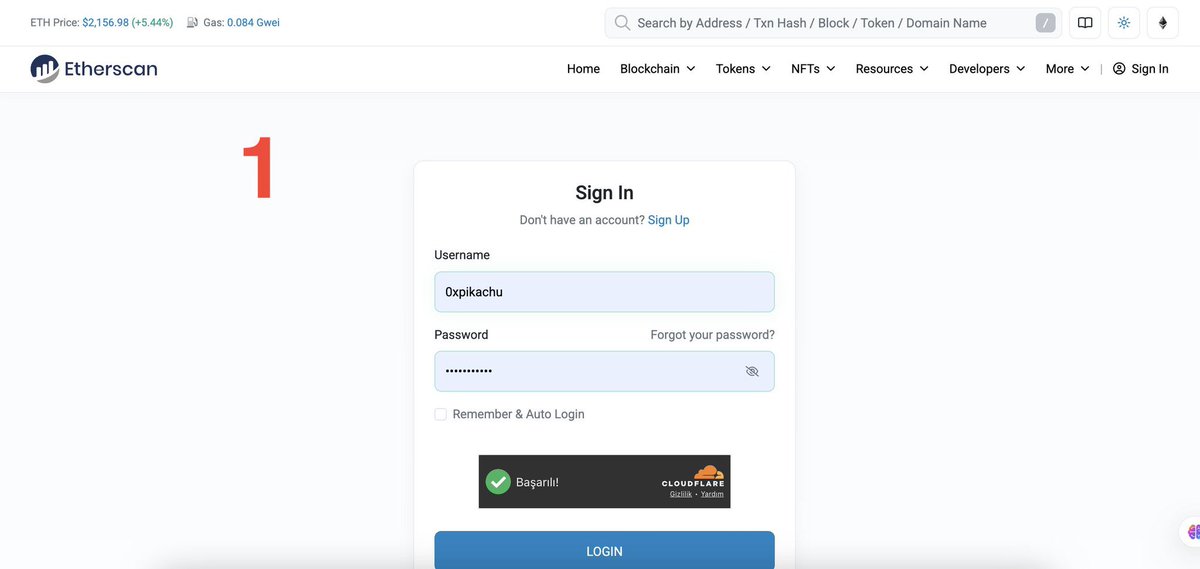
1️⃣ - Go to Etherscan. You need to register, click the link 🔗 - etherscan.io/apidashboard
2️⃣ - Generate an API KEY.
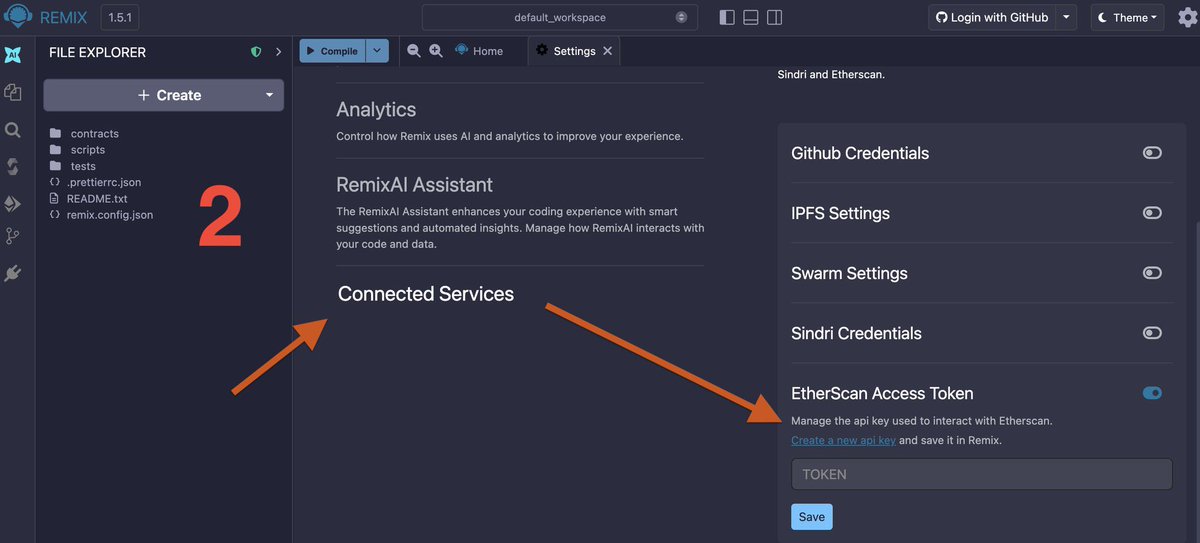
3️⃣ - Go to remix.ethereum.org
4️⃣ - In the settings section at the top right, click 'Connected Services'. In the screen that opens, paste the API KEY you obtained from Etherscan into the 'EtherScan Access Token' section at the bottom and save. Our connection is now complete. ✅
5️⃣ - Click Create on Remix and then click NEW FILE. Name the opened file goodmorning.sol.
6️⃣ - On the screen that opens, copy the simple code I created from my GitHub account (gist.github.com/0xmahro/7b77…) and paste it into the REMIX screen that opens!
7️⃣- Click on 'Solidity Compiler' on the left side. Click on the BLUE button that says 'Compiler günaydın.sol'. You'll notice a green checkmark immediately appears.
8️⃣ - Under Solidity compiler, click on 'Deploy & run transactions'. Click on the Environment section.
9️⃣- In the Browser extension window that opens on the right, select Injected Provider - M'tam'sk (I selected it because I use that wallet). An important detail here: perform the transaction with the wallet connected to your GUILD.
🔟 - After doing everything, click 'Deploy & Verify'.
That's it. Congratulations on your first deployment. Remember, being creative and developing an app always takes you one step further. This is the easy part.
Below are 4 photos, I've marked them with an X (maximum 4 photos allowed). You can see the other 4 images in the comments.
Good luck. 🍀 #Base @baseposting

8
27
89
8,529
SamarCryptoPunk retweeted

Feb 26
A creature unlike any other.
A dreamer, a disruptor … a … DEGEN.
777 supply. Free mint.
Q1 2026
Enter the dream → dream.degen.tips
100,358
52,766
63,911
1,404,501

SamarCryptoPunk retweeted

27 Nov 2025
1/ Phase 1 of the Concrete Social ‘Bags’ Campaign is live.
Your actions = your bags🗿
Start earning today, link below.
3,996
100,692
88,321
3,910,358
Jan 24
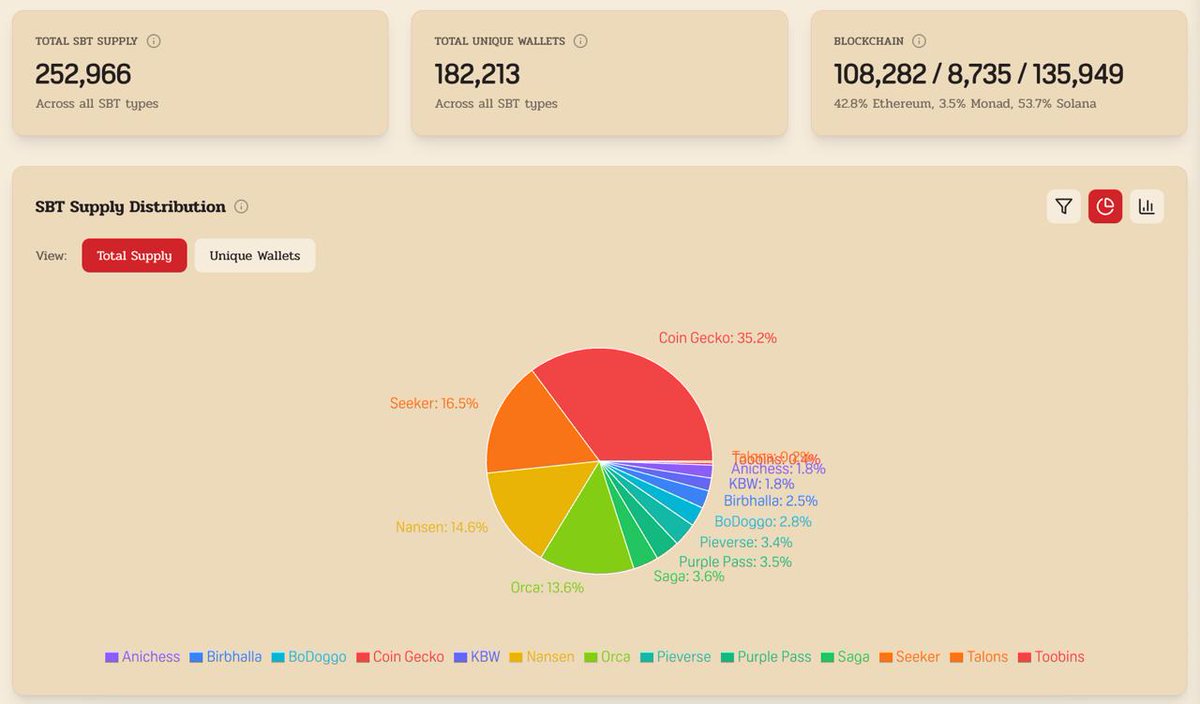
Birbbox giveaway visit on profile follow and comment.
Giveaway 5 birbbox 12 AM
TGE on 28 january.
Be birbish birbillions.
@moonbirds
@solana
@ASvanevik
@nansen_ai
@spencer
1
1
2
63
SamarCryptoPunk retweeted

Jan 22
The 24HR Solana birbathon. x.com/i/broadcasts/1LyGBXogj…
70
67
419
37,529
