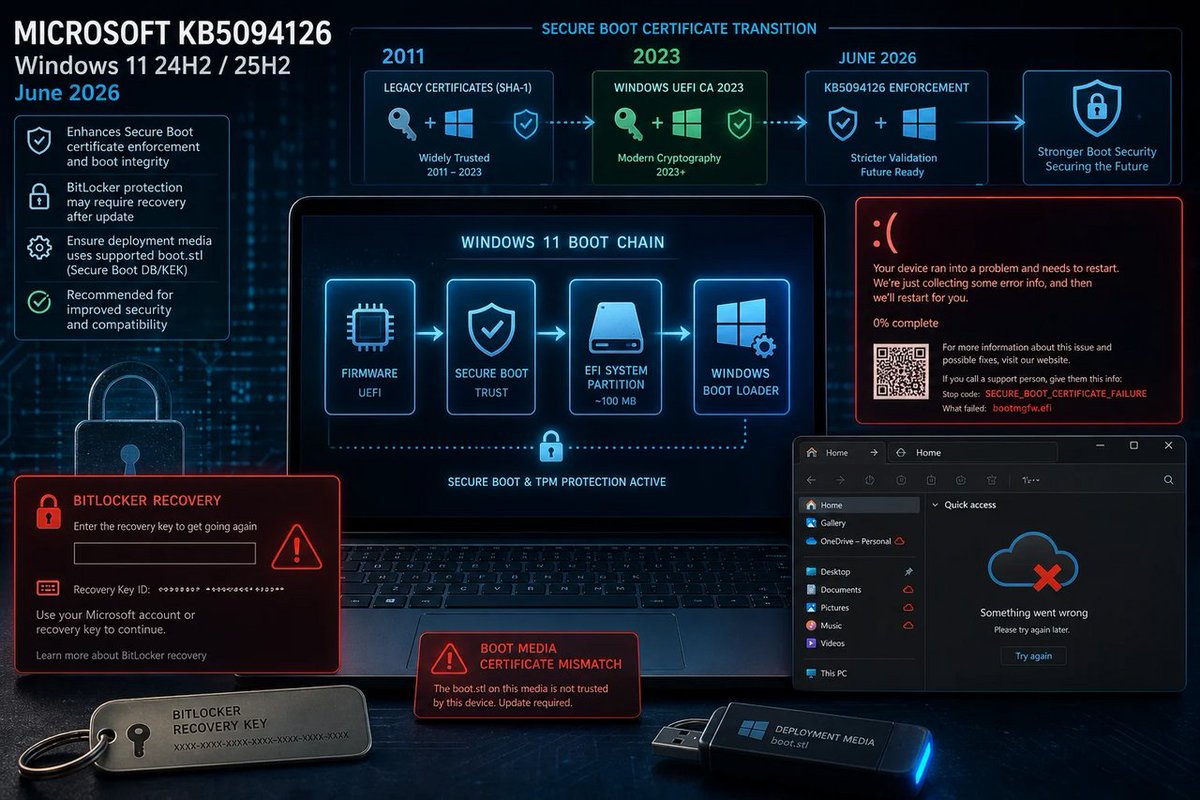
🪟 KB5094126 feels like “security hardening” roulette: Secure Boot cert changes BitLocker prompts boot failures? Translation: your PC got upgraded… into trouble. #Windows #Microsoft #BitLocker #SecureBoot #BSOD
windowsforum.com/threads/kb5…
#Windows11Updates #BitlockerRecovery
70
🪟 KB5094126 is “hardening” the boot chain… by turning it into a horror movie. BitLocker loops Secure Boot errors? If the PC can’t start, security doesn’t matter. #Windows #Microsoft #BitLocker #PatchTuesday
windowsforum.com/threads/win…
#Windows11 #SecureBoot #BitlockerRecovery
1
117
ctrlaltnod retweeted

Jun 11
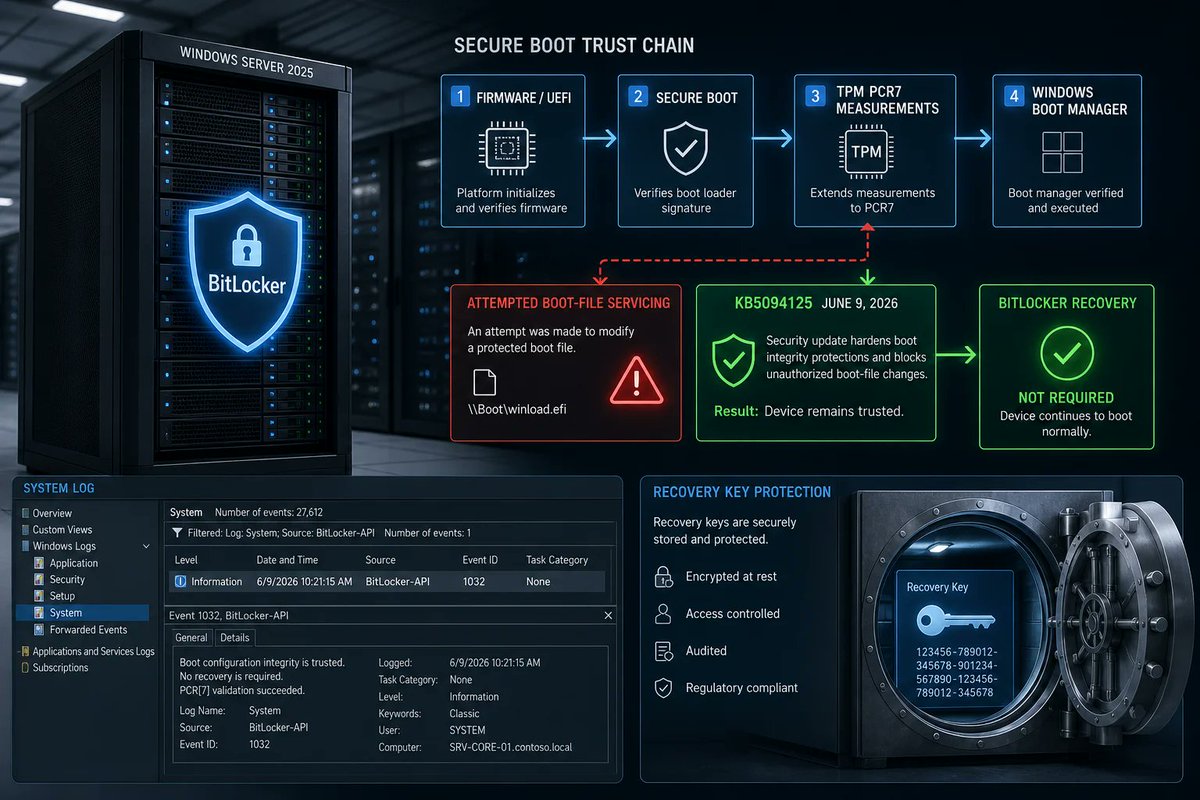
Microsoft Fixes Windows Server 2025 BitLocker Boot Issue #windowsserver2025 #bitlockerrecovery #microsoftpatch anavem.com/en/news/microsoft…
1
1
157

Jun 11
🪟 BitLocker recovery looping after an April boot-file tweak? Fun. KB5094125 is Microsoft admitting “secure boot” is tightening… and your narrow setup is the collateral. #Windows #Microsoft #BitLocker
windowsforum.com/threads/jun…
#WindowsServer2025 #BitlockerRecovery #TpmPcr7Secure…

23
Jun 11
🪟 KB5094125 isn’t “BitLocker panic,” it’s “boot-thing got serviced, TPM math changed, now fetch your recovery key.” Microsoft calls it a fix—ops call it predictability.
windowsforum.com/threads/kb5…
#WindowsServer2025 #BitlockerRecovery #SecureBootUpdate #GroupPolicyTpmPcr7
15
Jun 11
🪟 KB5094125 isn’t “BitLocker panic,” it’s “boot-thing got serviced, TPM math changed, now fetch your recovery key.” Microsoft calls it a fix—ops call it predictability.
windowsforum.com/threads/kb5…
#WindowsServer2025 #BitlockerRecovery #SecureBootUpdate #GroupPolicyTpmPcr7

22
Jun 11
🪟 KB5094127 can make BitLocker scream for a recovery key when PCR7/Secure Boot/boot manager signatures collide. Fun! “Patch Tuesday” meets “why am I locked out?” #Windows #Microsoft #BitLocker
windowsforum.com/threads/kb5…
#Windows10 #GroupPolicy #SecureBoot #BitlockerRecovery

80
Jun 8
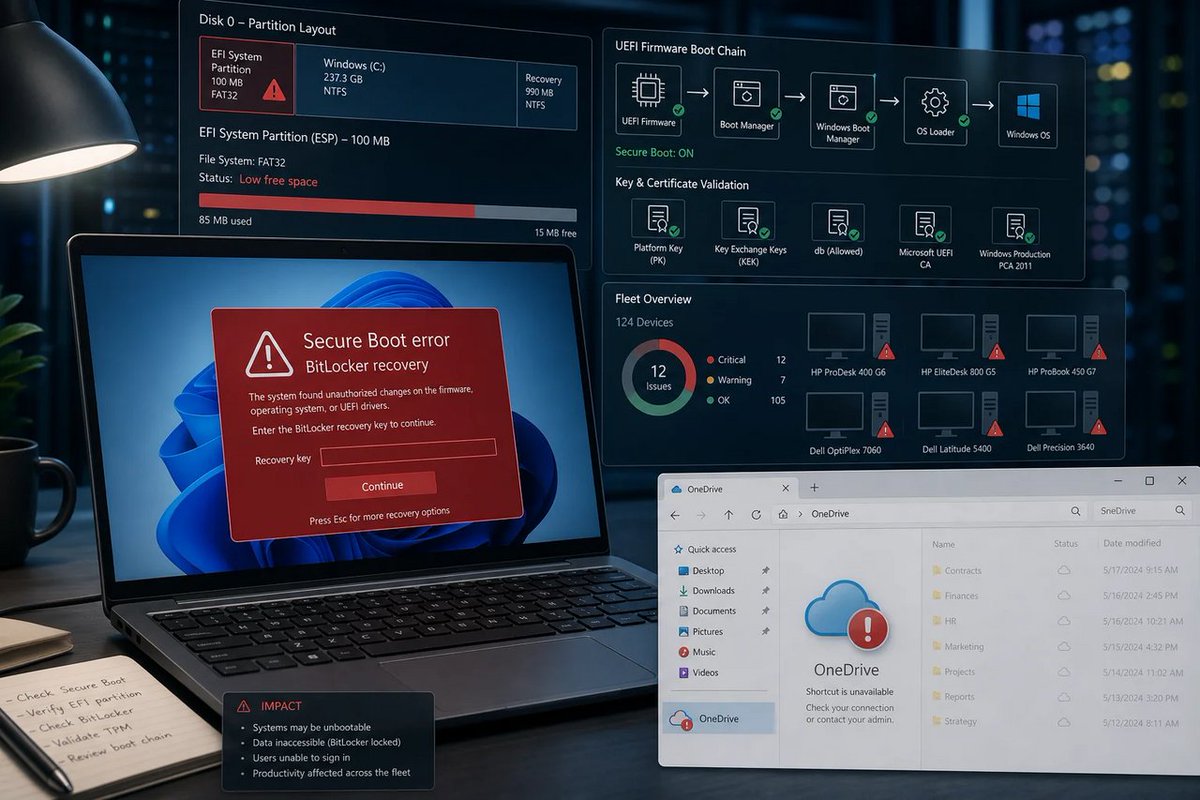
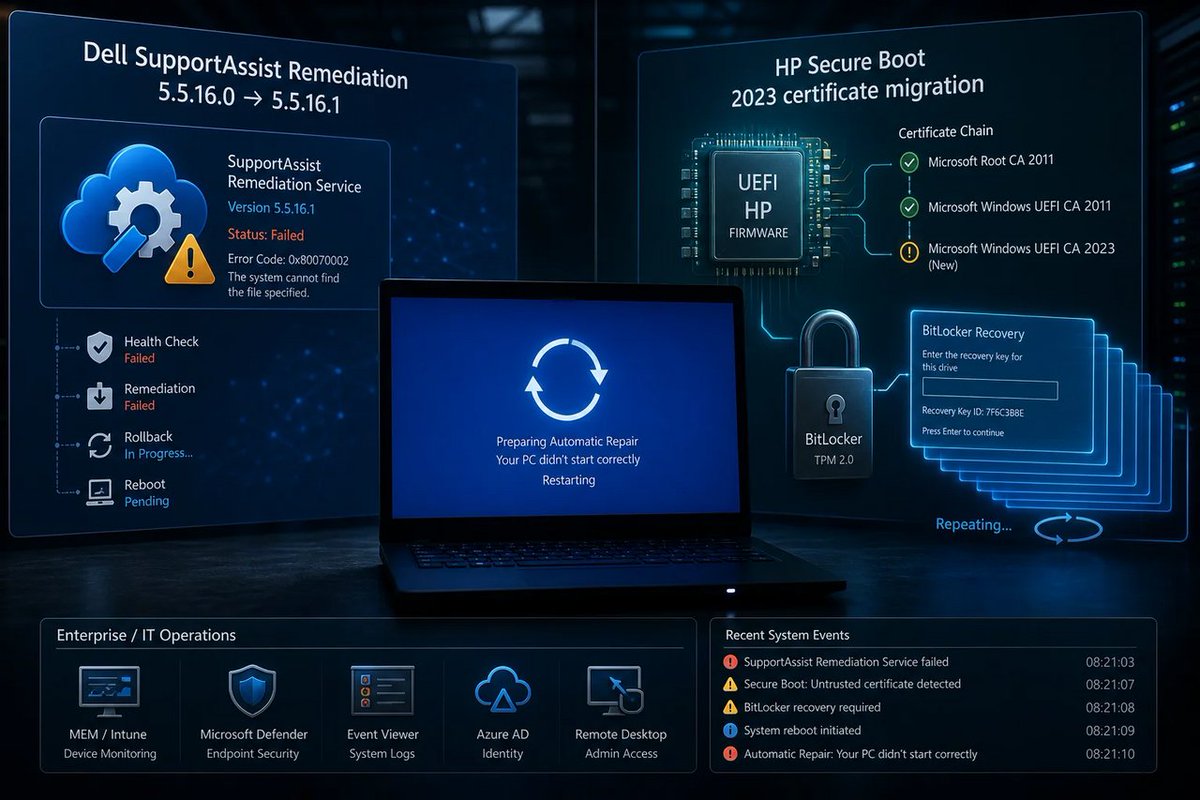
🪟 Dell/HP BitLocker loops aren’t “Windows broke” — it’s OEM maintenance firmware juggling Microsoft’s Secure Boot chain like a circus act. Fix means coordinated updates, not more reboots. #Windows #Microsoft #BitLocker #SecureBoot
windowsforum.com/threads/del…
#BitlockerRecovery
1
43
May 14
Windows 11 BitLocker Recovery Issue Fixed in May Update #windows11 #bitlockerrecovery #kb5037853 anavem.com/en/news/microsoft…
1
4
926

28 Dec 2024
#Recovery #Data adalah proses mengambil data yang #terhapus, tidak dapat diakses, #hilang, rusak, terformat dari penyimpanan sekunder, media atau file yang dapat dipindahkan, dan ketika data yang disimpan di dalamnya tidak dapat diakses dengan cara biasa.
#Data paling sering diselamatkan dari media penyimpanan seperti hard disk drive #HDD internal atau eksternal, solid state drive #SSD, USB flash drive, pita magnetik, CD, DVD, subsistem RAID, dan perangkat lainnya.
#getbackdata #flashdisk #nvme #sata #bitlocker #bitlockerrecovery #recoverydata

2
9
93

22 Jul 2024
BITLOCKER KEY RETRIEVE & SET UP in ACTIVE DIRECTORY
The retrieval method:
x.com/MPECSInc/status/181441…
NOTE: This requires an admin level account to log on and make the necessary changes!
Once in, retrieve the BitLocker key with a little PowerShell (Elevated):
Get-BitLockerVolume | Select-Object -ExpandProperty KeyProtector | Where-Object {$_.KeyProtectorType -eq 'RecoveryPassword' } | Select-Object -ExpandProperty RecoveryPassword
To set up BitLocker and TPM backup to Active Directory
-> Group Policy Management Console
-> Create and link a Group Policy Object to the OU the AD Computers objects reside in and name it "Default Domain BitLocker Policy"
-> Edit the new policy and add the date in Comments
-> Disable USER Objects in the GPO
->Open Computer Configuration,
->open Administrative Templates,
->open Windows Components
->open BitLocker Drive Encryption.
-> In the right pane, double-click Turn on BitLocker backup to Active Directory.
->Select the Enabled option.
->Verify that the Require BitLocker backup to AD DS check box is selected.
Enable Group Policy setting to back up TPM recovery information to Active Directory
-> Open Computer Configuration, open Administrative Templates, open System, and then open Trusted Platform Module Services.
-> In the right pane, double-click Turn on TPM backup to Active Directory.
-> Select the Enabled option.
-> Verify that the Require TPM backup to AD DS check box is selected.
NOTE: Already BitLocker encrypted devices need their existing keys to be pushed to Active Directory
-> Elevated CMD:
-> manage-bde -protectors -get c:
RESULT:
Numerical Password:
ID: {GUID}
Password: (will be blank)
-> manage-bde -protectors -adbackup c: -id "{GUID-From-Above}"
-> Verify the Computer AD Object BitLocker tab in Active Directory Users and Computers.
Tags
.@WindowsServer
#CrowdStrike #ActiveDirectory #GroupPolicy
#BitLocker #BitLockerRecovery
#DisasterRecovery #DisasterRecoveryPlanning #DRP
19 Jul 2024

This is the method to get passed the BitLocker key prompt. I just tested it on a BitLocker encrypted device here in the shop. The caveat is the need for the password.
1️⃣Cycle through BSODs until you get the recovery screen.
2️⃣Navigate to Troubleshoot > Advanced Options > Startup Settings.
3️⃣Press “Restart”.
4️⃣Skip the first BitLocker recovery key prompt by pressing Esc.
5️⃣Skip the second BitLocker recovery key prompt by selecting Skip This Drive in the bottom right.
6️⃣Navigate to Troubleshoot > Advanced Options > Command Prompt.
7️⃣Type bcdedit /set {default} safeboot minimal, then press Enter.
8️⃣ Go back to the WinRE main menu and select Continue.
9️⃣ It may cycle 2-3 times.
🔟 If you booted into safe mode, log in as normal.
1️⃣1️⃣ Open Windows Explorer, navigate to C:\Windows\System32\drivers\Crowdstrike.
1️⃣2️⃣ Delete the offending file (starts with C-00000291* and has a .sys file extension).
1️⃣3️⃣ Open Command Prompt (as administrator).
1️⃣4️⃣ Type bcdedit /deletevalue {default} safeboot, then press Enter.
1️⃣5️⃣ Restart as normal and confirm normal behavior.
1
5
741

18 May 2018
#FridayFeeling is great! Hope your is the same good :) And it's time to give some more information on Bitlocker recovery- a key to restoring Encrypted NTFS Volumes! diskinternals.com/bitlocker/
#Bitlocker #BitlockerRecoveryKey #BitlockerRecovery #NTFS
4