
May 29
nono.sh - sandbox the agent with this.
Toss fail2ban it’s useless and has had cves in the past. Add this to your sshd_config and restart sshd. Use keys only and encrypt your ssh keys on your workstation with a password
Protocol 2
# Only put DebianBanner if Ubuntu
DebianBanner no
PermitRootLogin no
PermitEmptyPasswords no
GSSAPIAuthentication no
PasswordAuthentication no
KerberosAuthentication no
ChallengeResponseAuthentication no
# Set ssh connection timeout to 1 hour because 15 minutes is nonsense
ClientAliveCountMax 6
ClientAliveInterval 600
2
419


May 15
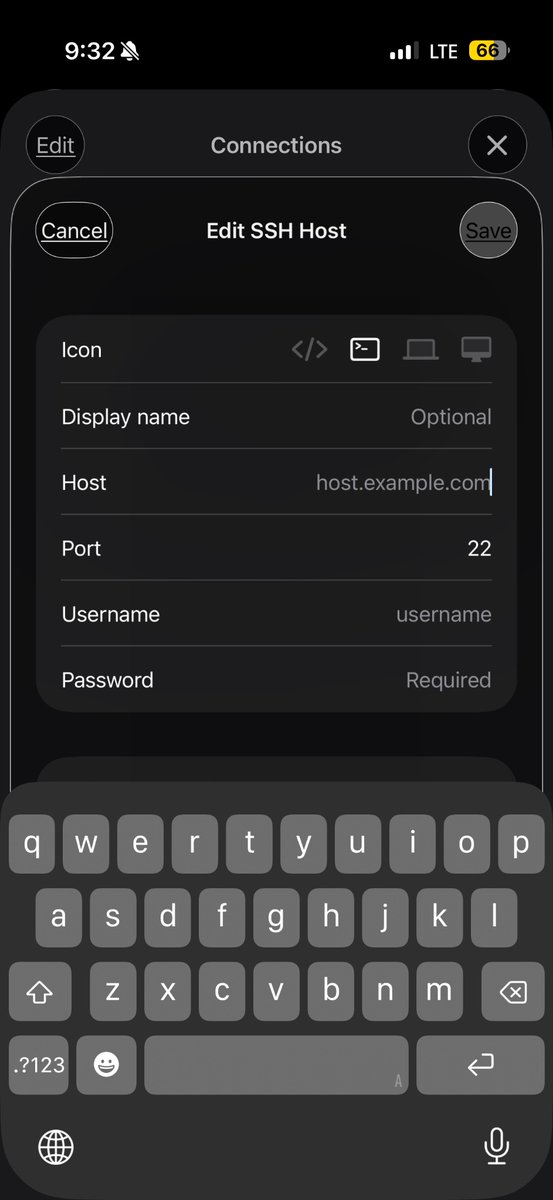
got telegram codex set up on my home server
codex remote is 99% of the way there but i just want `PasswordAuthentication no` :(

4
28
9,012

May 14
Here's how to lock down Hermes Agent so tight it makes OpenClaw 🦞 look like a screen door.
You don’t even have to do anything, just give Hermes this prompt once installed…
THE PROMPT:
---
You are a cybersecurity hardening assistant. Audit my Hermes Agent installation and ensure the following are in place:
1. UFW firewall on the correct ports.
2. Fail2Ban installed and active on SSH nginx
3. SSH configured: key-only, no root login, PasswordAuthentication no
4. Caddy reverse proxy with auto-HTTPS and BasicAuth on the Hermes gateway endpoint
5. Unattended-upgrades enabled for security patches
6. All Hermes systemd services set to restart on crash
For each step show me the status, fix it, and flag anything that's not compliant. Make sure I’m still able to login on my own devices, don’t lock ME out.
---
The result?
Your agent has its own hardened server. Isolated profiles. Caddy auth gate. Auto-restart on crash. Zero-touch patching.
While everyone else is praying nobody finds their exposed port 3100 you're running a production-grade AI stack.
Let me explain what these do…
🔥 UFW Firewall
→ Think of this as the bouncer at the door. Only lets in people on the list. Everyone else gets turned away before they even knock.
→ Port 22 (SSH only) 80/443 (web)
→ Deny everything else. Hard stop.
🚫 Fail2Ban
→ If someone tries the wrong password too many times, it permanently bans their IP. Like a nightclub that blacklists you for life after 3 failed attempts.
→ Auto-ban on brute force
→ Active monitoring on nginx jail
🔐 SSH Hardened
→ Instead of a password to get in, you need a physical key — one that only exists on YOUR device. Even if someone knows your password, they can't get in.
→ Key-only auth. Zero passwords.
→ Root login OFF
→ sshd_config locked
🌐 Caddy Reverse Proxy
→ This is the encrypted tunnel between the internet and your agent. Every connection is HTTPS — no one can eavesdrop on the traffic. Plus there's a login gate before anyone even sees your agent.
→ Auto-HTTPS on every endpoint
→ Basic auth gate in front of your agent
🔄 Auto Security Updates
→ Your server patches itself automatically. Like having a maintenance crew that shows up overnight so you wake up with everything already fixed.
→ Unattended upgrades ON
→ Zero-touch patching
I sleep well at night knowing my setup isn’t the easy hack.
Nothing is “unhackable” but like having a bike lock, thieves tend to move on to easy targets.
Point your Hermes at this post and YOU won’t be the easy target anymore.
Bookmark this so you don’t lose this information when the app refreshes.
Follow @agentskills_ai for more high utility agent building guides.

3
3
74
15,394

Most sysadmins give SSH access just for file uploads and end up worrying about what users do on the server.
You can avoid that by giving SFTP-only access to a single directory without shell, no commands, no browsing.
🔐 SSH tip: SFTP chroot jail setup
Add this to sshd_config:
Match User sftpuser
ChrootDirectory /var/sftp/sftpuser
ForceCommand internal-sftp
PasswordAuthentication yes
AllowTcpForwarding no
X11Forwarding no
Now the user can only upload/download files inside their folder.
Want a full multi-user setup, groups, and troubleshooting for common chroot errors?
Read here: pro.tecmint.com/setting-up-a…
Follow @tecmint for more #Linux and #SSH tips.
18
77
3,322

Apr 29
First, modify sshd_config and disable password-based authentication by setting PasswordAuthentication no.
1
5
749

nano /etc/ssh/sshd_config
PasswordAuthentication no
1
3
1,018


Apr 14
Step 4: Disable password authentication
PasswordAuthentication no
Passwords get brute-forced. SSH keys don’t.
You already set up key-based auth in Step 1. Passwords are dead weight now.
3
686
Most people think adding a strong password to their SSH server is enough.
It's not. Bots are hammering port 22 every single minute - thousands of attempts per hour, fully automated.
One config change makes all of it completely pointless.
🔐 SSH tip of the day:
Disable password auth, block root login, move off port 22 - three lines in sshd_config:
PasswordAuthentication no
PermitRootLogin no
Port 2222
Want the full step-by-step with verification commands and the safe sequence to follow?
Chapter 16 of our SSH course walks you through every change, every test, and every verification — nothing left to chance.
Read it → pro.tecmint.com/ssh-hardenin…
Follow @tecmint for a new SSH chapter every week.
7
18
111
5,684

Mar 28
Here is the bash script , you can create once and use for all your Ubuntu Servers.
1. Create file:
nano harden.sh
2. Put code in:
#!/usr/bin/env bash
set -Eeuo pipefail
# =========================
# CONFIG
# =========================
NEW_USER="deploy"
TIMEZONE="Europe/Berlin"
APP_DIR="/opt/"
# 🔴 REPLACE THIS WITH YOUR SSH PUBLIC KEY
SSH_PUBLIC_KEY="ssh-ed25519 AAAA_REPLACE_WITH_YOUR_PUBLIC_KEY your@email.com"
# =========================
# HELPERS
# =========================
log() {
echo ""
echo "==> $1"
}
require_root() {
if [[ "${EUID}" -ne 0 ]]; then
echo "Please run as root."
exit 1
fi
}
backup_file() {
local file="$1"
if [[ -f "$file" ]]; then
cp "$file" "${file}.bak.$(date %Y%m%d%H%M%S)"
fi
}
set_sshd_option() {
local key="$1"
local value="$2"
local file="/etc/ssh/sshd_config"
if grep -Eq "^[#[:space:]]*${key}[[:space:]] " "$file"; then
sed -i -E "s|^[#[:space:]]*${key}[[:space:]] .*|${key} ${value}|g" "$file"
else
echo "${key} ${value}" >> "$file"
fi
}
# =========================
# START
# =========================
require_root
if [[ "$SSH_PUBLIC_KEY" == *"REPLACE_WITH_YOUR_PUBLIC_KEY"* ]]; then
echo "Please set your SSH_PUBLIC_KEY before running."
exit 1
fi
log "Updating system"
export DEBIAN_FRONTEND=noninteractive
apt-get update
apt-get full-upgrade -y
log "Installing base packages"
apt-get install -y \
sudo \
ufw \
fail2ban \
unattended-upgrades \
apt-listchanges \
curl \
git \
vim
log "Creating user"
if id "$NEW_USER" >/dev/null 2>&1; then
echo "User already exists."
else
adduser --disabled-password --gecos "" "$NEW_USER"
fi
usermod -aG sudo "$NEW_USER"
log "Setting up SSH key"
install -d -m 700 -o "$NEW_USER" -g "$NEW_USER" "/home/${NEW_USER}/.ssh"
touch "/home/${NEW_USER}/.ssh/authorized_keys"
chmod 600 "/home/${NEW_USER}/.ssh/authorized_keys"
chown "$NEW_USER:$NEW_USER" "/home/${NEW_USER}/.ssh/authorized_keys"
grep -qxF "$SSH_PUBLIC_KEY" "/home/${NEW_USER}/.ssh/authorized_keys" || \
echo "$SSH_PUBLIC_KEY" >> "/home/${NEW_USER}/.ssh/authorized_keys"
log "Hardening SSH"
backup_file "/etc/ssh/sshd_config"
set_sshd_option "PermitRootLogin" "no"
set_sshd_option "PasswordAuthentication" "no"
set_sshd_option "KbdInteractiveAuthentication" "no"
set_sshd_option "ChallengeResponseAuthentication" "no"
set_sshd_option "PubkeyAuthentication" "yes"
set_sshd_option "UsePAM" "yes"
set_sshd_option "X11Forwarding" "no"
set_sshd_option "MaxAuthTries" "3"
set_sshd_option "LoginGraceTime" "30"
sshd -t
systemctl restart ssh || systemctl restart sshd
log "Configuring firewall"
ufw --force reset
ufw default deny incoming
ufw default allow outgoing
ufw allow OpenSSH
ufw --force enable
log "Setting up fail2ban"
cat > /etc/fail2ban/jail.local <<EOF
[sshd]
enabled = true
port = ssh
maxretry = 5
bantime = 1h
findtime = 10m
EOF
systemctl enable fail2ban
systemctl restart fail2ban
log "Enabling automatic security updates"
dpkg-reconfigure -plow unattended-upgrades
log "Setting timezone"
timedatectl set-timezone "$TIMEZONE"
log "Preparing app directory"
mkdir -p "$APP_DIR"
chown -R "$NEW_USER:$NEW_USER" "$APP_DIR"
chmod 750 "$APP_DIR"
if [[ -f "${APP_DIR}/.env" ]]; then
chmod 600 "${APP_DIR}/.env"
fi
log "Final checks"
ufw status verbose
fail2ban-client status
echo ""
echo "✅ HARDENING COMPLETE"
echo ""
echo "⚠️ IMPORTANT:"
echo "1. Open a NEW terminal"
echo "2. Test login:"
echo " ssh ${NEW_USER}@YOUR_SERVER_IP"
echo "3. Only then close your current session"
3. Execute
chmod x harden.sh
sudo ./harden.sh
Mar 28

Ship Fast, Lock It Down: 10-Minute VPS Hardening for AI Builders
Vibecoding is a hype narrative nowadays.
Most people use Git automatic deployment
If you want to be pro use your own VPS.
/Costs monthly only $2-$3/
Before you start you should
Ubuntu 24.04LTS Hardening Guide
1. Update System
apt update && apt full-upgrade -y
reboot
2. Create non-root user
adduser „Name you Choose“
usermod -aG sudo „Name you Choose“
3. Create SSH Private/Public Key
I used puttyGen on Windows
4. Add your SSH Key
mkdir -p /home/„Name you Choose“/.ssh
nano /home/„Name you Choose“/.ssh/authorized_keys
- chown -R „Name you Choose“: „Name you Choose“ /home/„Name you Choose“/.ssh
- chmod 700 /home/„Name you Choose“/.ssh
- chmod 600 /home/„Name you Choose“/.ssh/authorized_keys
5. Secure SSH config
nano /etc/ssh/sshd_config
Config it like this:
PermitRootLogin no
PasswordAuthentication no
KbdInteractiveAuthentication no
PubkeyAuthentication yes
6. Restart SSH
systemctl restart ssh
ssh „Name you Choose“@YOUR_SERVER_IP
7. Enable firewall (UFW)
Block everything incoming
Outgoing everything allowed
apt install ufw -y
ufw default deny incoming
ufw default allow outgoing
ufw allow OpenSSH
ufw enable
ufw status
8. Install Fail2Ban (Bruteforce protection)
apt install fail2ban -y
systemctl enable --now fail2ban
Do Basic Config:
nano /etc/fail2ban/jail.local
[sshd]
enabled = true
port = ssh
maxretry = 5
bantime = 1h
findtime = 10m
Restart:
systemctl restart fail2ban
9. Enable Automatic Security Updates
apt install unattended-upgrades -y
dpkg-reconfigure -plow unattended-upgrades
Now you hardened your Server from the biggest threats.
Stay tuned for more tech stuff.
4
381
Mar 28
Ship Fast, Lock It Down: 10-Minute VPS Hardening for AI Builders
Vibecoding is a hype narrative nowadays.
Most people use Git automatic deployment
If you want to be pro use your own VPS.
/Costs monthly only $2-$3/
Before you start you should
Ubuntu 24.04LTS Hardening Guide
1. Update System
apt update && apt full-upgrade -y
reboot
2. Create non-root user
adduser „Name you Choose“
usermod -aG sudo „Name you Choose“
3. Create SSH Private/Public Key
I used puttyGen on Windows
4. Add your SSH Key
mkdir -p /home/„Name you Choose“/.ssh
nano /home/„Name you Choose“/.ssh/authorized_keys
- chown -R „Name you Choose“: „Name you Choose“ /home/„Name you Choose“/.ssh
- chmod 700 /home/„Name you Choose“/.ssh
- chmod 600 /home/„Name you Choose“/.ssh/authorized_keys
5. Secure SSH config
nano /etc/ssh/sshd_config
Config it like this:
PermitRootLogin no
PasswordAuthentication no
KbdInteractiveAuthentication no
PubkeyAuthentication yes
6. Restart SSH
systemctl restart ssh
ssh „Name you Choose“@YOUR_SERVER_IP
7. Enable firewall (UFW)
Block everything incoming
Outgoing everything allowed
apt install ufw -y
ufw default deny incoming
ufw default allow outgoing
ufw allow OpenSSH
ufw enable
ufw status
8. Install Fail2Ban (Bruteforce protection)
apt install fail2ban -y
systemctl enable --now fail2ban
Do Basic Config:
nano /etc/fail2ban/jail.local
[sshd]
enabled = true
port = ssh
maxretry = 5
bantime = 1h
findtime = 10m
Restart:
systemctl restart fail2ban
9. Enable Automatic Security Updates
apt install unattended-upgrades -y
dpkg-reconfigure -plow unattended-upgrades
Now you hardened your Server from the biggest threats.
Stay tuned for more tech stuff.
3
645


Mar 16
Here are the 6 commands I run on every fresh VPS to lock it down quickly. This assumes a typical Linux server such as Ubuntu or Debian.
The goal is to eliminate the most common attack paths used by internet bots.
⸻
1. Update everything immediately
Most compromises happen because packages are outdated.
sudo apt update && sudo apt upgrade -y
This patches known vulnerabilities.
2. Create a non-root user
Never operate your server as root.
sudo adduser eagle
Then give it sudo privileges:
sudo usermod -aG sudo eagle
Now you will SSH using:
ssh eagle@server-ip
3. Install your SSH key
From your local machine:
ssh-copy-id eagle@server-ip
This places your public key into:
~/.ssh/authorized_keys
Now test login:
ssh eagle@server-ip
If it works, continue.
4. Disable password logins
Edit the SSH configuration.
sudo nano /etc/ssh/sshd_config
Change these:
PasswordAuthentication no
PermitEmptyPasswords no
ChallengeResponseAuthentication no
Restart SSH:
sudo systemctl restart ssh
Now password brute force becomes impossible.
5. Disable root SSH login
Still inside /etc/ssh/sshd_config:
PermitRootLogin no
Restart SSH again:
sudo systemctl restart ssh
Attackers love targeting the root account. This removes that attack path entirely.
6. Install Fail2Ban
This automatically blocks IPs attempting brute-force attacks.
sudo apt install fail2ban -y
Start it:
sudo systemctl enable fail2ban
sudo systemctl start fail2ban
Fail2Ban will ban attackers after a few failed attempts.
Bonus (very powerful)
Enable a firewall with UFW:
sudo ufw allow OpenSSH
sudo ufw enable
Check status:
sudo ufw status
Why do I do all these?
Within minutes of putting a VPS online, bots will try things like:
root
admin
ubuntu
test
git
But because you now have:
•no password authentication
•no root login
•fail2ban blocking attackers
•firewall rules
they will all fail.
One last security trick (optional but powerful)
Change the SSH port from 22 to something random like 4822.
In /etc/ssh/sshd_config:
Port 4822
Restart SSH:
sudo systemctl restart ssh
Now connect with:
ssh -p 4822 eagle@server-ip
This removes 99% of bot noise.
Follow me for similar contents 🤝
2
106

Feb 19
Tracking an intrusion that used Amadey for initial access where they relied entirely on 𝗹𝗲𝗴𝗶𝘁𝗶𝗺𝗮𝘁𝗲 𝘀𝗼𝗳𝘁𝘄𝗮𝗿𝗲 for persistence and command and control.
𝗘𝘅𝗲𝗰𝘂𝘁𝗶𝗼𝗻 𝗳𝗹𝗼𝘄:
Initial access via MSI→ installation via ps1 executed under SYSTEM → hidden PowerShell with ExecutionPolicy Bypass → 𝗡𝗲𝗯𝘂𝗹𝗮 𝗺𝗲𝘀𝗵 𝗩𝗣𝗡 dropped under ProgramData and installed as a service → 𝗢𝗽𝗲𝗻𝗦𝗦𝗛 𝗱𝗲𝗽𝗹𝗼𝘆𝗲𝗱, 𝘀𝘀𝗵𝗱.𝗲𝘅𝗲 𝗿𝗲𝗻𝗮𝗺𝗲𝗱 → SSH bound to a non-standard port with PasswordAuthentication enabled → services set to Automatic start → 𝗹𝗼𝗰𝗮𝗹 𝘂𝘀𝗲𝗿 𝗰𝗿𝗲𝗮𝘁𝗶𝗼𝗻 𝗮𝘁𝘁𝗲𝗺𝗽𝘁𝗲𝗱 with hardcoded credentials
All artifacts were 𝘀𝘁𝗮𝗴𝗲𝗱 𝗶𝗻 𝗣𝗿𝗼𝗴𝗿𝗮𝗺𝗗𝗮𝘁𝗮, with service names crafted to appear legitimate. Nebula established encrypted peer-to-peer connectivity outside traditional HTTP beaconing. 𝗢𝗽𝗲𝗻𝗦𝗦𝗛 𝗽𝗿𝗼𝘃𝗶𝗱𝗲𝗱 𝗱𝗶𝗿𝗲𝗰𝘁 𝘀𝗵𝗲𝗹𝗹 𝗮𝗰𝗰𝗲𝘀𝘀. Both mechanisms persisted across reboots.
The stealth factor here is the absence of custom malware. Nebula and OpenSSH are legitimate administrative tools, signed and widely used in enterprise environments. When repurposed this way, they blend into normal operations. C2 traffic occurs over encrypted overlay networking and SSH rather than typical web-based channels, making signature-based detection unreliable, especially when binaries are renamed.
𝗙𝗿𝗼𝗺 𝗮 𝗵𝘂𝗻𝘁𝗶𝗻𝗴 𝗽𝗲𝗿𝘀𝗽𝗲𝗰𝘁𝗶𝘃𝗲, focus on behavior over signatures. Look for hidden PowerShell with bypass flags, new Windows services pointing to user-writable directories such as ProgramData, renamed binaries whose internal metadata does not match the filename, unexpected SSH listeners on non-standard ports, and overlay networking tools installed without a clear business justification.
1
11
55
4,359

