

May 25
实测:GPT-Image-2竟然能直接生成分层 PSD!效率拉满的两种野路子
说句扎心的,2026 年了,如果还在玩“AI 生成一张图,然后扔进 PS 里熬夜手动抠图”的那套流程,真的有点对不起现在的生产力工具。
我经常在后台收到这类私信: “老师,AI 生成的海报图质量确实高,但客户非要把中间那个产品往左挪 5 厘米,或者想换个背景色,我这一动就得重来,心态崩了怎么办?”
其实很多人不知道,现在的 GPT-Image2 配合推理模型,已经能实现“真·分层”输出了。说白了,就是它不再只给你一张“拍平”了的 JPG,而是能直接吐出一堆对齐好的、透明背景的图层,甚至直接拼成 PSD。
今天我就把压箱底的这两套方案彻底拆解开,不谈虚的,全是实操细节。
这种“真分层”对咱们打工人到底有什么意义?
以前咱们管 AI 叫“抽卡机”,你永远不知道下一张出的图里,背景和主体是不是黏在一起的。 但如果是真分层的 PSD,你拿到手之后在 Photoshop 里打开,就是每一个元素独立一个图层。这意味着: 你可以直接改文字,不用担心破坏底下的底纹。 背景想换就换,主体商品纹丝不动。 最关键的是,能直接把半成品丢给设计师,让他们做最后的微调,而不是让人家从头帮你抠。 这种工作流的本质变化,就是把 AI 从一个“画画的”变成了“帮你做素材、排版、切图的一条龙助理”。
逻辑其实很简单,但很多人卡在第二步
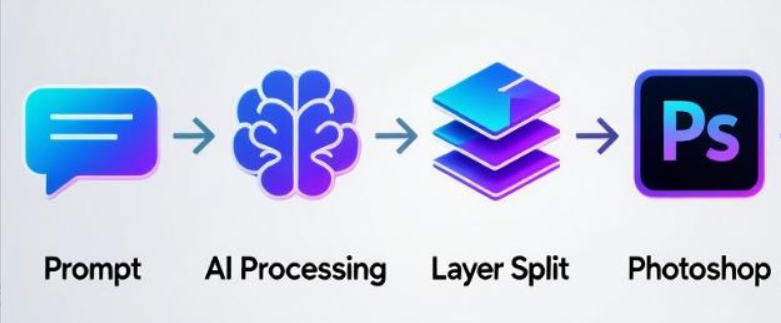
在聊具体怎么操作之前,咱们得先把这套玩法的底层链路搞清楚。其实就三步走:
1.先让 GPT-Image2 画一张你满意的效果图,作为母版。2.开启“Thinking 模式”(比如 o1 或 o3 系列),让 AI 像个熟练的切图工一样,把这张图里的元素一个个识别出来,“拆碎”成独立的、白底的 PNG。3.把这些拆好的图片,按照层叠顺序合并,并把背景色抠掉,合成最终的 PSD。 这里有个细节大家要注意:普通的 GPT-4o 虽然也能画图,但涉及到“拆解、空间对齐”这种逻辑活,必须得用带思维链(Thinking)的模型。
整体工作流程示意看下图:
方案 A 与方案 B:到底是手动还是自动化?
我发现很多新手一上来就想搞自动化,其实真没必要。 如果你只是偶尔做一张公众号封面,或者一周就折腾那么两三张电商主图,老老实实用网页版手动操作(方案 A)。这就好比你就出门买个菜,没必要专门考个飞行执照开飞机。 但如果你是做工作室的,每天要量产几百张图,或者要把这个功能集成到你自己的工具里,那必须走 API 调用的路子(方案 B)。
两种实现路径对比
说实话,AI生图如果走官方API确实有点肉疼,一张几毛钱看着不多,跑多了真吃不消。但中转平台价格直接砍到5-8分/张,成本瞬间友好。顺便安利香蕉模型Nano banana 2,亲测好用不踩雷。
方案 A:手把手教你在网页端“白嫖”分层 PSD
这种方法零门槛,只要你有 ChatGPT Plus 账户就行。
1. 生成那个让你心动的“母版”图
在对话框里直接描述你的需求。比如你想做个运动鞋的促销海报,你就跟它说:“帮我生成一张红色背景的电商海报,中间是一个蓝色的运动鞋,右上角加个‘限时特惠’的标签。” 这里有个坑:第一版图只要构图和主要元素对了就行,别在这一步纠结太久。因为我们要的是它的骨架。
2. 祭出“Thinking 模式”进行外科手术式拆分
这一步最关键。你把模型切换到 o1 或类似的推理模型。 为什么?因为普通模型分不清什么是“遮挡”,什么是“背景”。只有 Thinking 模式能理解:鞋子后面那个影子虽然是黑色的,但它应该属于鞋子这个图层,而不是背景。 直接把下面这段 JSON 格式的指令丢给它,千万别自作聪明改成大白话。AI 对结构化数据的理解比对人类语言要准得多:
{"task": "split_image_layers","input": "刚才生成的那张海报图","output": {"type": "multiple_images","background": "solid_white","avoid": "fake_transparency"},"requirements": {"one_element_per_image": true,"canvas_size": "same_as_original","preserve_element_size": true,"preserve_relative_position": true,"photoshop_ready_overlay": true,"no_manual_movement_needed": true}}
发完这段话,你会看到 AI 框框一顿输出。它会吐出几张看起来怪怪的图——每一张都是白底,上面只有一个孤零零的元素,位置还跟原图一模一样。
3. 命令它一键合成 PSD
这就好比你让它切好了菜,现在该下锅炒了。把刚才生成的那些白底图全部选中,发这段指令:
{"task": "merge_layers_to_psd","input": "以上所有白底分层图片","output": {"type": "psd","remove_background": "solid_white","layers": "independent_editable_layers"},"requirements": {"canvas_size": "same_as_original","preserve_relative_position": true,"preserve_z_order": true,"photoshop_editable": true}
这时候,AI 会生成一个下载链接。你把它下载下来,在 PS 里一打开,保准你惊喜得叫出声。
方案 B:给极客和批量党的 API 自动化路径
说实话,如果你是帮公司批量做产品图,再一张张去网页点,那效率太低了。这时候就需要动用一点 Python 小脚本。 这里我直接给一个核心逻辑。
第一步:准备好你的“军火库”
你需要配置好 API。这时候 iThinkAPI 的优势就体现出来了,你只需要一个域名和一个 Key,剩下的就是调接口的事。
import osfrom openai import OpenAI# 环境变量里放你的 Key,安全第一client = OpenAI( api_key="你的iThinkAPI_Key", base_url="api.ithinkai.cn/v1" # 记得换成中转站的地址)
第二步:生成并保存母版
这里调用 gpt-image-2。
response = client.images.generate( model="gpt-image-2", prompt="一张极简主义的咖啡海报,主体是热气腾腾的拿铁,背景是深木色桌面", size="1024x1024", quality="high")# 这里会得到一个 URL 或 Base64,咱们把它存成本地图片
第三步:让 o1 模型上场拆图
这里咱们不是对话,而是要把图传给它,让它理解。
# 核心就是传一张 image_url 过去,配合咱们前面的 JSON Promptsplit_response = client.chat.completions.create( model="o1", # 记住,必须是推理模型 messages=[{ "role": "user", "content": [ {"type": "image_url", "image_url": {"url": f"data:image/png;base64,{img_base64}"}}, {"type": "text", "text": "执行 split_image_layers 任务,按元素拆分图层"} ] }])
第四步:合成并下载
这一步通常 AI 会返回一个链接。虽然这个过程看起来比网页版麻烦一点,但一旦跑通了,你可以写个循环,一分钟吐出几十张分层 PSD。
API 调用代码示意图看下面
我踩过的那些“血泪坑”,大家注意避让
虽然方案挺完美,但我实测下来,有几个细节如果注意不到,出来的图还是没法用。
坑一:图层位置对不齐
我之前发现,有时候 AI 拆出来的元素,虽然背景是白的,但它把元素缩放了。等你放到 PS 里叠加的时候,发现鞋子比背景大了一圈。 避坑指南: 在指令里必须加上 "canvas_size": "same_as_original"。告诉 AI:不管你拆哪一层,画板大小必须跟我原图死磕到底。
坑二:边缘有白边(毛刺)
这是最头疼的。因为 AI 在识别“白底”时,有时候会为了边缘平滑,留下一圈淡淡的白影。 避坑指南: 如果对精度要求极高,别指望 AI 能 100% 抠干净。最好的办法是,拿到 AI 拆出来的白底 PNG 后,在 PS 里用“选择并遮住”,或者直接用现在的“一键去背”功能过一遍。 记住:AI 帮你完成了 90% 的体力活(识别位置、拆分结构),剩下那 10% 的精细活,咱还是得稍微动动手。
坑三:逻辑混乱
有时候你在一个对话窗口里聊久了,AI 就会开始“胡言乱语”,生成的图层顺序乱七八糟。 避坑指南: 我发现一个细节,只要 AI 翻车了,千万别在原地跟它纠缠。直接 新开一个对话窗口,把之前的母版图发给它重新开始。这能解决 80% 的模型幻觉问题。
总结一下
其实现在 AI 领域的门槛正在从“会写 Prompt”转向“会构建工作流”。 把 GPT-Image2、Thinking 模型和 PS 整合在一起,就是一种典型的 2026 年高阶玩法。它不再追求“一键生成”,而是追求“生成后的可控性”。
如果你是设计师或运营,我真心建议你现在就去试一张。第一次跑通可能要花 15 分钟,但一旦你掌握了这个逻辑,以后你每天能省下至少 2 个小时的抠图时间。 去试试吧,哪怕只是为了下班能早点吃上饭。
我是你们的 AI 实战老友。如果你觉得这篇干货对你有用,别忘了点个赞。后续我会继续拆解更多真正能落地、能省钱的 AI 骚操作!
#AI #AIAgent @grok
11
18
65
5,759


Jan 11
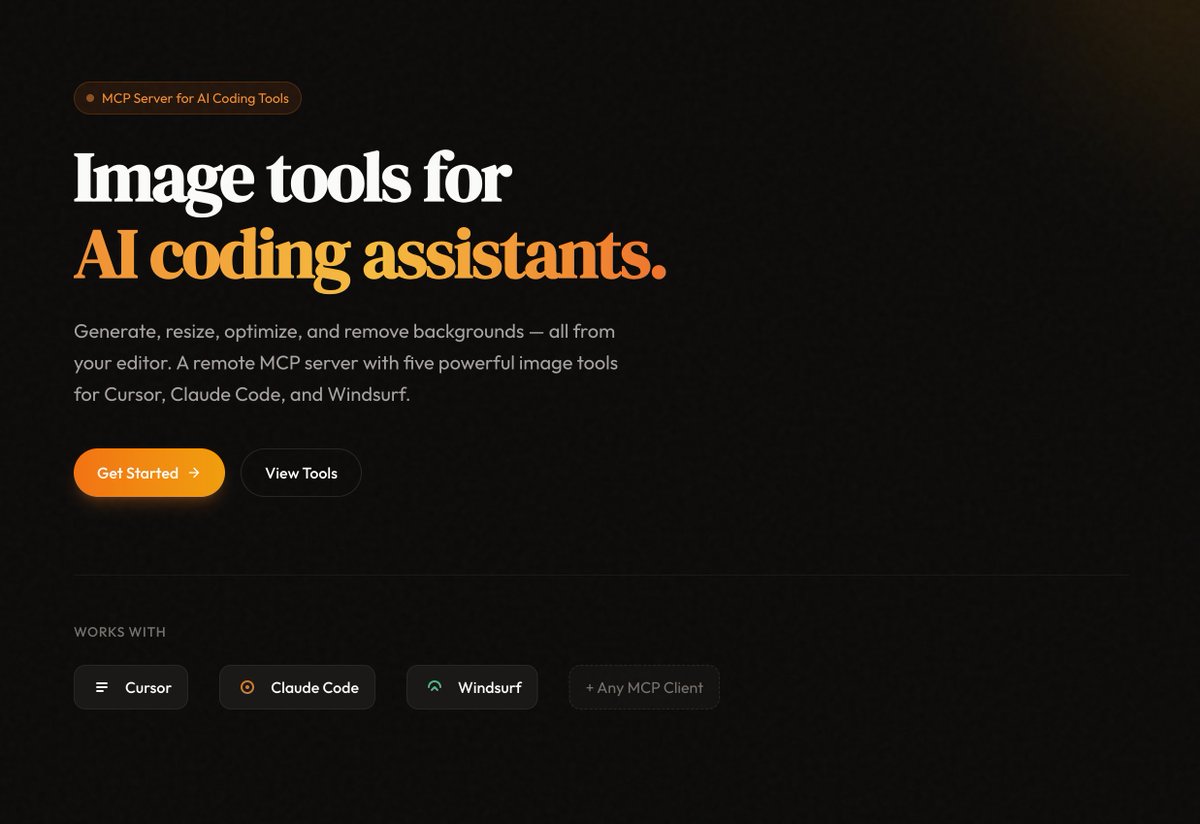
I built an MCP server for myself so that when I'm vibe coding on @cursor_ai it can auto generate images or icons for me and put them right into my website.
Supports:
- generate_image
- generate_icon
- remove_background
- resize_image
- upload_image
The MCP server is hosted on @vercel and all generated images are stored on @supabase.
All you do to add the functionality to your vibe coding app (or agent) is paste 3 lines of code!
4
16
1,296

8 Best AI Tools to Remove Unwanted Objects from Photos
Discover the top 8 AI-powered tools to remove unwanted objects from your photos effortlessly.
Read more 👇
fotto.ai/blog/8-best-ai-tool…
#remove_object #remove_background #object_eraser @AI_tools #photo_edit #enhance_image

1
3
55

5 Mar 2025
Introducing MCP-LOGO-GEN
built my first ever MCP Server that lets you generate logos/icons/favicons directly in Cursor using @FAL
Steps:
1. generate_image
2. remove_background
3. dowload_image
4. scale_image (32x32, 128x128)
opensource link below with setup intructions in readme. hope its useful for you and DM if theres any issues. enjoy!
2
5
59
7,731

3 Mar 2025
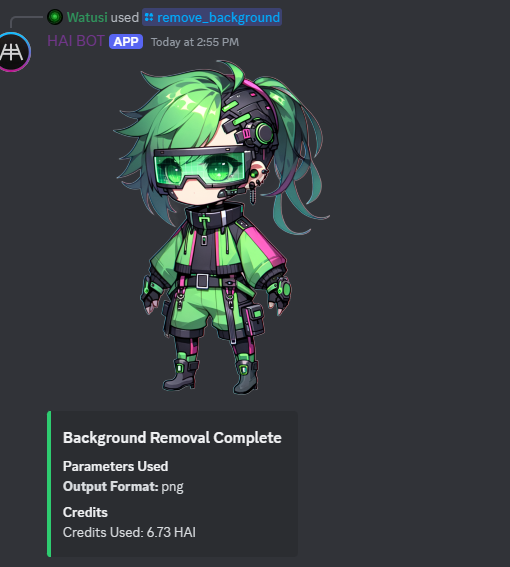
2. Remove Background
HAI Bot has a /remove_background command, so that's super easy too
1
4
132
Change the background color or image in just one click — done in 10 seconds!
Try Fotto.AI now for free!
fotto.ai/editor/change-backg…
#change_bg #swap_bg #edit_online #remove_background #AI_generated #ai_challenge_pic

1
2
37
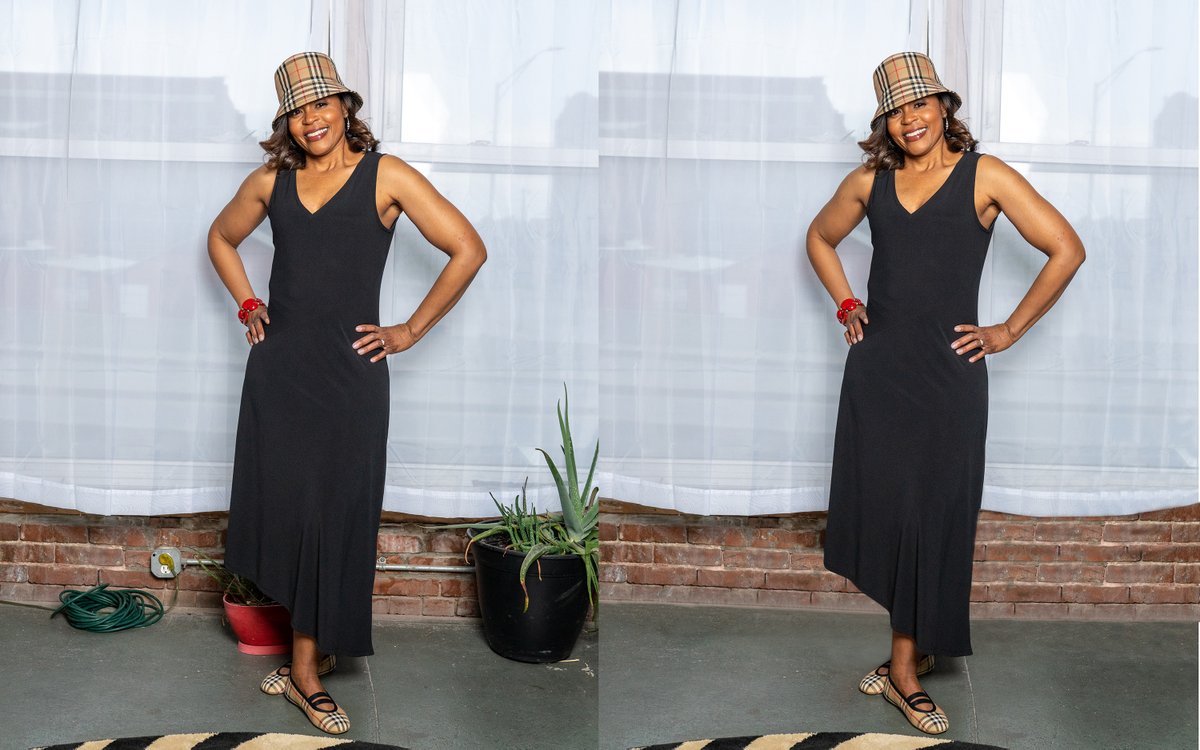
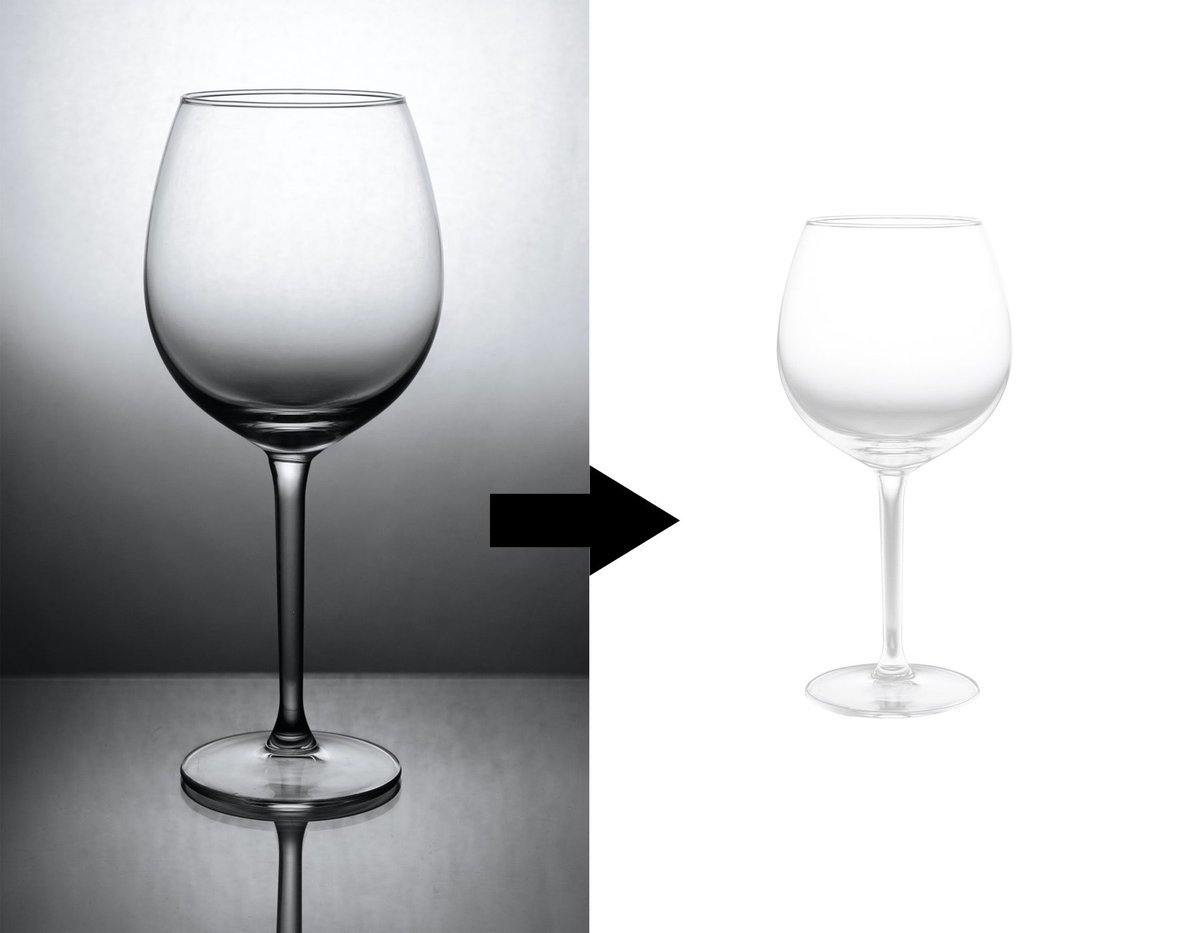
Image showcasing a before and after example of background removal using fotto.ai.
Try now for free!
fotto.ai/editor/remove-backg…
#remove_bg #remove_background #photo_edit #remove_object #transparent_bg #swap_bg

1
2
27
Remove Image Background
Try Fotto.AI Remove bg for free now!
fotto.ai/editor/remove-backg…
"Remove Background & Swap with Any Image or Color!" 🚀🎨
fotto.ai/editor/change-backg…
#remove_background #swap_bg #change_backgound #Ai_tools #photo_editor
2
2
35

13 Nov 2024
Text Behind Image - (文字背景图像合成)实现方案解析
'Text Behind Image' 功能在 HF Spaces 已可体验,作者 @yvrjsharma 借助 @Gradio 搭建了演示空间,使用 BiRefNet 处理图片背景,通过背景移除和图层重组来实现,一起看看这个功能的实现逻辑。
// 文字背景图像合成具体流程:
- 将输入图片从 numpy 数组转换为 PIL Image
- 调用 remove_background() 移除图片背景
- 创建一个透明图层用于放置文字
- 设置字体和颜色
- 计算文字位置
- 绘制文字
- 合成最终图像
HF Space:
huggingface.co/spaces/ysharm…

Play with "Text Behind Image" tool, recreated with Gradio and Birefnet-lite! 🔥
The first version is now live. You can quickly generate as many images as you want 🚀 Link below 👇
4
712

22 Apr 2024
2
169


7 Jul 2023
To remove the background of an image using Python, you can utilize the power of image processing libraries such as OpenCV and PIL (Python Imaging Library). Here's a basic example of how you can achieve this:
```python
import cv2
from PIL import Image
def remove_background(image_path):
# Load the image using PIL
image = Image.open(image_path)
# Convert the image to RGB mode
image = image.convert("RGB")
# Convert PIL image to OpenCV format
open_cv_image = cv2.cvtColor(numpy.array(image), cv2.COLOR_RGB2BGR)
# Create a mask where white pixels (background) will be set to 0 and black pixels (foreground) to 1
mask = cv2.cvtColor(open_cv_image, cv2.COLOR_BGR2GRAY)
mask = cv2.threshold(mask, 250, 255, cv2.THRESH_BINARY_INV)[1]
# Apply the mask to the original image, setting background pixels to transparent
open_cv_image[mask != 0] = [0, 0, 0]
# Convert the image back to PIL format
image = Image.fromarray(cv2.cvtColor(open_cv_image, cv2.COLOR_BGR2RGB))
# Save the resulting image without the background
image.save("image_without_background.png")
# Example usage
remove_background("image_with_background.png")
```
In this example, we first load the image using PIL and convert it to RGB mode. Then, we convert the PIL image to OpenCV format to perform image processing operations. We create a mask by thresholding the image, where the background pixels become white and the foreground pixels become black. Finally, we apply the mask to the original image, setting the background pixels to transparent, and save the resulting image without the background.
Note that you'll need to have OpenCV and PIL libraries installed in your Python environment to run this code. You can install them using `pip install opencv-python` and `pip install pillow` if you haven't already.
5
910

20 Sep 2022
اقوى مزايا IOS 16 الجديد عزل خلفية اي صوره. تابع الفيديو التوضيح في نصف دقيقه. #iOS16 #ios #iPhone14Pro #remove_background
1
3

16 Aug 2022
Here is my recent buyer #Hair_masking Job. If you need any kind of #Graphic_Design Services, Please feel free to message me.
Check out my Portfolio: behance.net/sumitislam1996
#photo_editing #retouching #object_remove #background_change #photoshop_editing #cut_out #remove_background
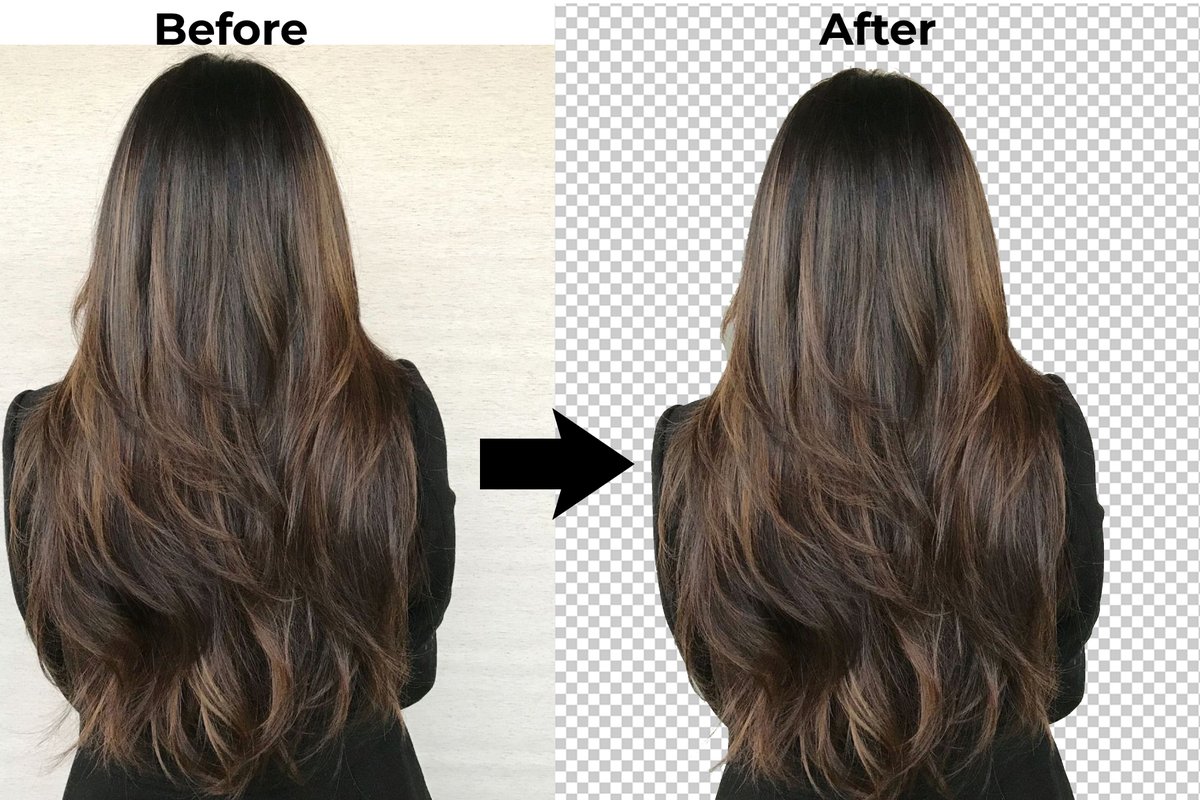
ALT #hair_masking #SheHulk #green_screen_remove #cut_out_background
1
1

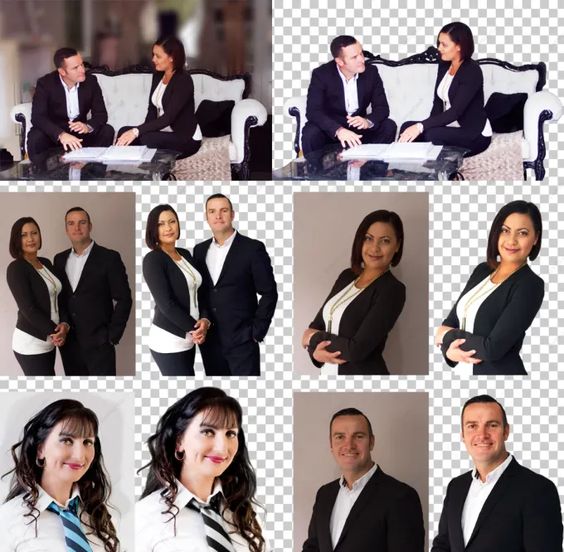
Remove Background from Image | Clipping Path Service 2022
#photobackgroundremoval #modelbackgroundremoval #background_remove #clippingpath #photoshop #photography #photo_editing #background #background_removal #removal #product_background_remove #remove_background #whitebackgroun
3
3 Aug 2022
Here is my recent buyer #Object_Remove Job. If you need any kind of #Graphic_Design Services, Please feel free to message me.
Check out my Portfolio: behance.net/sumitislam1996
#after_effects #graphic_designer #remove_people #Removing_objects #remove_background #photoshop #designer

1

20 Jul 2022
Here is my Recent buyer #BackgroundRemoval job.If you need any kind of graphic design please feel free knock here
behance.net/wlllhkh
#Background_Removal
#cutout #removel
#background_Remove
#white_transparent
#white_backgound
#remove_bg #cut
#Transparent
#Remove_background
1

12 May 2022
Today @init_ml we launch ClipDrop Remove Background: The most accurate background remover, available for free. Take the time to try it 🙂 producthunt.com/posts/clipdr… on @producthunt #remove_background #iA #free
1
6